Comprehensive Guide to Causes, Symptoms, and Relief

Persistent head pain that won’t respond to rest or painkillers often has an unexpected source: wisdom teeth. Understanding whether impacted or erupting third molars are triggering your headaches can lead to lasting relief. In this guide, we explain how wisdom teeth cause headaches, classify the types of pain involved, identify key symptoms, explore underlying factors beyond impaction, and outline effective home remedies, professional treatments, and post-extraction care. Lane & Associates Family Dentistry combines advanced imaging, expert oral surgeons, and patient-focused comfort to resolve headaches linked to wisdom tooth issues.

We will cover:
  • The connection between wisdom teeth and head pain via pressure and nerve irritation
  • Classification of tension, migraine, sinus, and referred-pain headaches
  • Recognizing jaw pain, gum swelling, and referral to ear and neck
  • Causes beyond impaction such as infection, cysts, bruxism, and TMJ
  • Proven home remedies, over-the-counter medications, and extraction benefits
  • Post-operative headache management and when to seek expert evaluation

** This is not medical advice, each case is uniquely different consult a trained professional **

How Can Wisdom Teeth Cause Headaches?

Wisdom teeth can cause headaches when pressure from erupting or impacted third molars irritates surrounding structures and nerves. This pressure compresses the jawbone, inflames the gums, and sends referred pain through the trigeminal nerve, manifesting as head pain. For example, an angled wisdom tooth pushing against the jaw nerve can trigger a dull, throbbing ache across the temple region, bridging dental issues to headache relief strategies.

Woman with mouth pain

What Is the Role of Impacted Wisdom Teeth in Headache Development?

Impacted wisdom teeth occur when third molars fail to fully erupt, causing them to push against adjacent teeth and bony walls. This impaction creates localized inflammation and nerve compression that translates into headache symptoms. For instance, a horizontally impacted molar pressing on the mandibular nerve can send pain signals up to the forehead and temples, setting the stage for trigeminal irritation.

How Does the Trigeminal Nerve Link Wisdom Teeth to Head Pain?

The trigeminal nerve transmits sensation from the teeth and facial structures to the brain, so irritation of this nerve by an impacted molar can lead to headache. When inflammation or pressure affects the mandibular branch, pain signals travel upward, causing referred pain in the temples, cheeks, or even behind the eyes. Recognizing this nerve pathway clarifies why dental pressure often feels like a migraine.

Can Erupting Wisdom Teeth Exert Pressure That Leads to Headaches?

As wisdom teeth emerge, they exert force on the jawbone and neighboring teeth, creating muscular strain and nerve irritation that can manifest as headaches. This eruptive pressure peaks when the gums become swollen and the bone shifts to accommodate the new tooth. Understanding this eruption process highlights why early evaluation by an oral surgeon at Lane & Associates can prevent chronic head pain.

What Types of Headaches Are Caused by Wisdom Teeth?

Wisdom teeth issues can trigger several headache categories, including tension-type pain from jaw muscle fatigue, migraine-style attacks due to nerve sensitization, sinus headaches via upper molar proximity to sinuses, and referred-pain headaches when dental nerves misfire. Recognizing these distinct patterns helps identify the most effective relief strategies.

Headache Type

Mechanism

Typical Symptoms

Tension Headache

Jaw muscle strain from pressure

Dull, bilateral “band-like” pain

Migraine

Trigeminal nerve sensitization

Throbbing pain, nausea, light sensitivity

Sinus Headache

Sinus cavity pressure from upper molar

Facial pressure, nasal congestion, thick mucus

Referred Pain Headache

Nerve cross-signals in jaw and skull

Toothache with radiating head or temple pain

These classifications guide targeted treatments and clarify why some headaches respond to dental intervention.

How Do Tension Headaches Relate to Wisdom Teeth Issues?

Tension headaches linked to wisdom teeth stem from prolonged jaw muscle contraction as the mouth adjusts to erupting or misaligned molars. Muscle fatigue in the masseter and temporalis manifests as a pressing pain across the forehead and scalp. Alleviating this tension through jaw-relaxation techniques can reduce headache frequency.

Can Wisdom Teeth Trigger Migraines or Sinus Headaches?

Migraines and sinus headaches can originate from wisdom tooth irritation when nerve pathways or sinus membranes become inflamed. Upper molars share nerve roots with sinus cavities, so gum inflammation or impaction can spread, triggering both congestion and migraine pathways via the trigeminal system.

What Is Referred Pain and How Does It Cause Headaches from Wisdom Teeth?

Referred pain occurs when sensory nerves convey tooth pain signals to other head regions, leading to perceived headache. The mandibular and maxillary branches of the trigeminal nerve can confuse signals, making pain felt in the temple, cheek, or even behind the eyes. Recognizing referred pain clarifies why tooth troubles often feel like primary headache disorders.

What Are the Symptoms of Wisdom Teeth Headaches? How to Identify Them

Symptoms of wisdom teeth headaches include jaw tenderness, gum swelling, ear or neck pain, and radiating head discomfort that worsens with chewing or mouth opening. These signs differentiate dental headaches from primary neurological conditions and guide appropriate treatment.

Which Jaw Pain and Tenderness Indicate Wisdom Teeth Problems?

Key jaw-related symptoms often accompany wisdom teeth headaches:

  • Sharp or dull aching behind the second molar radiating toward the ear.

  • Tenderness when pressing the rear gum line near the molars.

  • Difficulty fully opening the mouth due to muscle tension.

Persistent jaw pain in these regions signals a dental origin of headache.

How Do Swollen Gums and Pericoronitis Signal Headache Causes?

Gum swelling and pericoronitis develop when partially erupted wisdom teeth harbor bacteria, leading to infection and inflammation that can radiate head pain. Pericoronitis inflammation triggers pain receptors in the gingiva, and the resultant systemic inflammatory response often manifests as headache and fever.

Can Wisdom Teeth Headaches Cause Earache and Neck Pain?

Earache and neck pain often accompany wisdom teeth headaches due to nerve overlap and muscular compensation. Inflammation near the jaw can irritate the auriculotemporal nerve branch, producing ear pain and causing neck muscles to tighten in compensation, resulting in tension-related headaches.

wisdom teeth

What Causes Wisdom Teeth Headaches Beyond Impaction? Infection, Cysts, and TMJ Explained

Beyond impaction, wisdom teeth headaches may arise from pericoronitis, cyst formation, bruxism-induced muscle strain, malocclusion, and TMJ disorders that affect jaw joint health. Addressing these broader causes ensures comprehensive relief.

How Does Pericoronitis Lead to Headaches?

Pericoronitis is an infection of the gum tissue around a partially erupted tooth, causing inflammatory mediators to trigger headache. Pain receptors in the inflamed gingiva send nociceptive signals via facial nerves, resulting in referred pain to the head and temples.

Can Dental Decay and Cysts from Wisdom Teeth Cause Head Pain?

Cavities and cysts around wisdom teeth can create localized pressure and bacterial toxins that irritate nerves, resulting in headaches. A growing cyst may expand before compressing nerve fibers in the jaw, manifesting as persistent head pain that mimics chronic headache disorders.

What Is the Impact of Bruxism and Malocclusion on Wisdom Teeth Headaches?

Bruxism and misaligned bites force wisdom teeth to exert uneven pressure, escalating muscle tension and headache risk. Teeth grinding strains the masseter muscle and temporomandibular joint, which can refer pain across the skull and exacerbate wisdom tooth–related headaches.

How Does TMJ Disorder Relate to Wisdom Teeth and Headaches?

TMJ disorder arises when jaw joint stress from wisdom teeth misalignment or muscle overuse disrupts normal movement, causing headache. Inflammation in the temporomandibular joint refers pain to the temples, ears, and neck, closely mimicking migraine patterns and requiring specialized management.

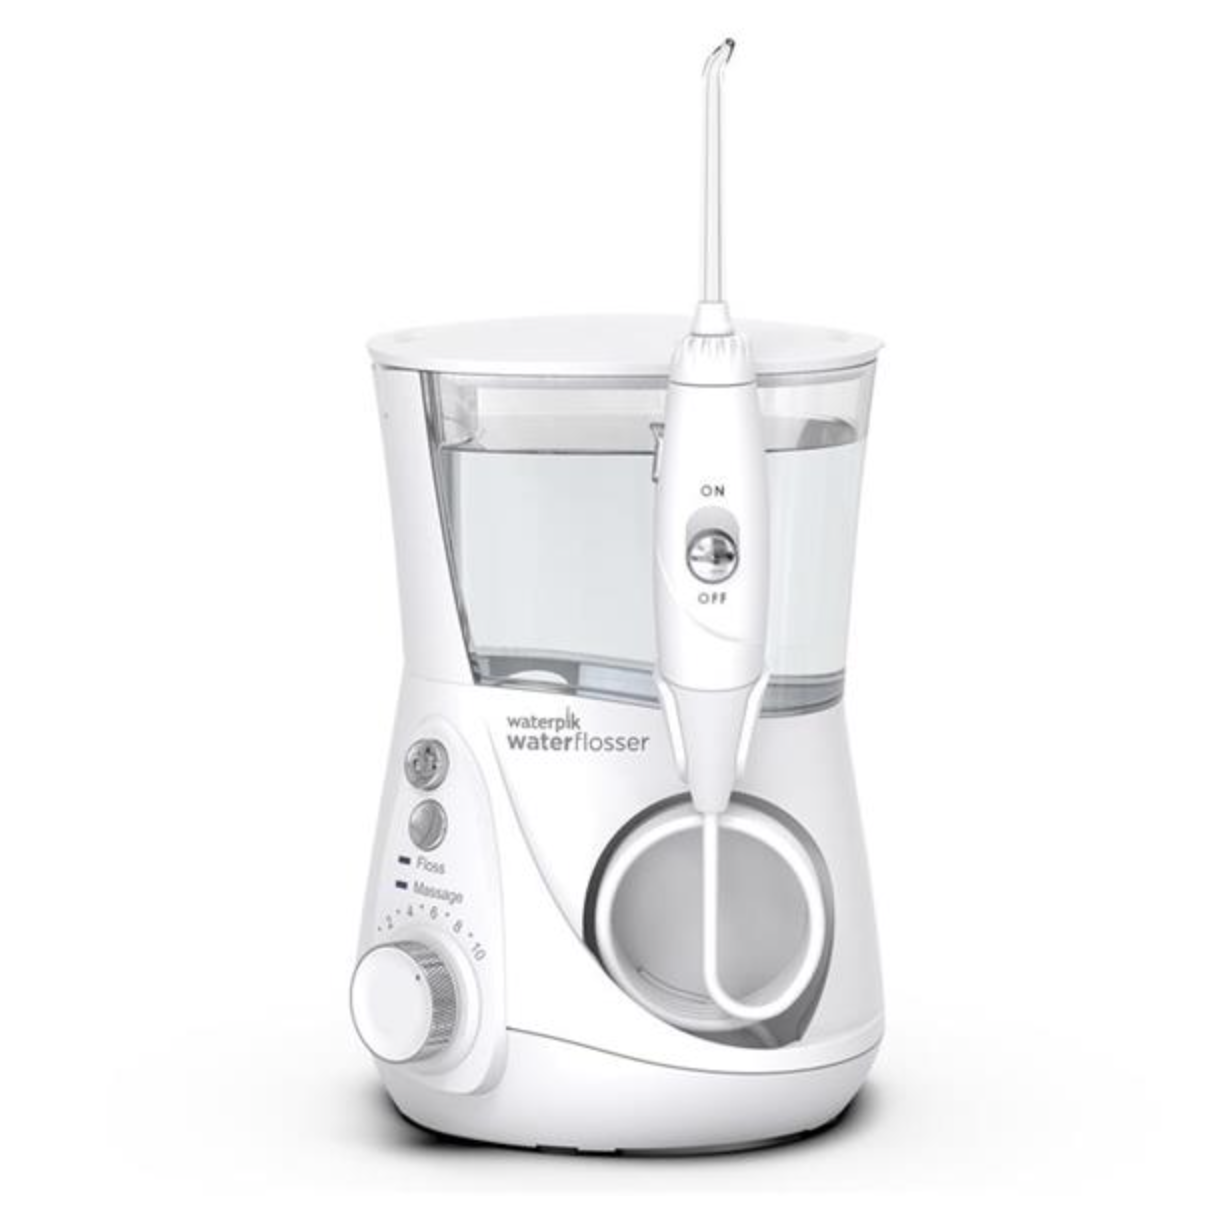
How Can You Find Relief from Wisdom Teeth Headaches? Treatment and Home Remedies

Effective relief combines home care, over-the-counter medications, and professional treatments to address both symptoms and root causes of wisdom teeth headaches. Implementing these options can restore comfort and prevent recurrence.

What Home Remedies Help Ease Wisdom Teeth Headaches?

Simple home remedies can reduce inflammation and ease pain associated with wisdom teeth headaches. Try these at-home strategies for temporary relief:

  • Apply a warm compress to the jaw to relax muscles and improve circulation.

  • Use a cold pack on the cheek to reduce gum inflammation.

  • Rinse with warm salt water to cleanse bacteria and soothe swollen tissues.

  • Maintain gentle oral hygiene to prevent debris buildup around wisdom teeth.

These measures offer quick symptom control while preparing for professional evaluation.

When Are Over-the-Counter Pain Relievers Effective for Wisdom Teeth Headaches?

Over-the-counter pain relievers provide targeted headache relief when inflammation and muscle strain drive the pain. NSAIDs such as ibuprofen inhibit inflammatory mediators and reduce swelling, while acetaminophen manages discomfort in patients with sensitive stomachs or contraindications.

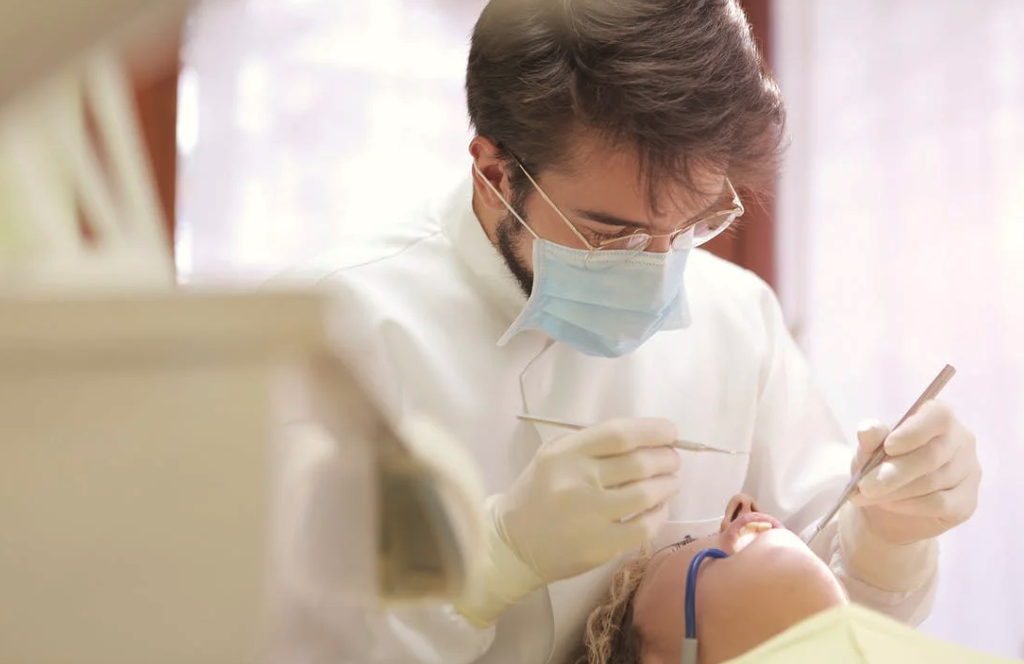
How Does Wisdom Tooth Extraction Provide Headache Relief?

Surgical removal of problematic wisdom teeth eliminates the source of nerve irritation and pressure, leading to permanent headache resolution. An oral surgeon at Lane & Associates uses gentle techniques and advanced anesthesia to extract teeth safely, restoring comfort and preventing future dental headaches.

What to Expect After Wisdom Teeth Removal: Managing Post-Operative Headaches

Headaches after extraction can occur due to anesthesia effects, jaw stiffness, and healing inflammation, but proper care mitigates these symptoms and supports smooth recovery.

Why Do Headaches Occur After Wisdom Teeth Extraction?

Post-surgical headaches often stem from residual anesthetic effects, muscle tension, and stress on the jaw during the procedure. Jaw immobilization, swelling, and minor sinus cavity shifts can contribute to dull, throbbing head pain in the days following surgery.

How Can Dry Socket Cause Post-Extraction Headaches?

Dry socket develops when the blood clot at the extraction site dislodges, exposing bone and nerve endings that intensify facial and head pain. Severe pain often radiates to the temple and can persist for days without proper intervention.

What Are Effective Ways to Manage Headaches After Surgery?

Recommended strategies for post-extraction headache care:

  • Follow prescribed analgesics and antibiotics exactly as directed.

  • Apply an ice pack intermittently to reduce swelling and headache intensity.

  • Perform light jaw movements to prevent stiffness without dislodging blood clots.

  • Attend follow-up visits to monitor healing and address complications promptly.

These measures ensure both headache relief and optimal recovery.

When Should You See a Dentist or Oral Surgeon for Wisdom Teeth Headaches?

Professional evaluation is necessary when headache symptoms are severe, persistent, or accompanied by signs of infection or jaw dysfunction. Early consultation prevents complications and streamlines treatment. We recommend getting treatment as soon as possible.

What Signs Indicate You Need an Immediate Professional Evaluation for Wisdom Teeth Headaches?

Seek professional care if you experience:

  • Severe, throbbing headache lasting more than 48 hours despite home remedies.

  • Pronounced jaw swelling and redness around a wisdom tooth.

  • Earache combined with high fever or purulent discharge.

  • Restricted mouth opening or unexplained weight loss.

These red flags warrant immediate dental or surgical assessment. If you are experiencing these call a professional now.

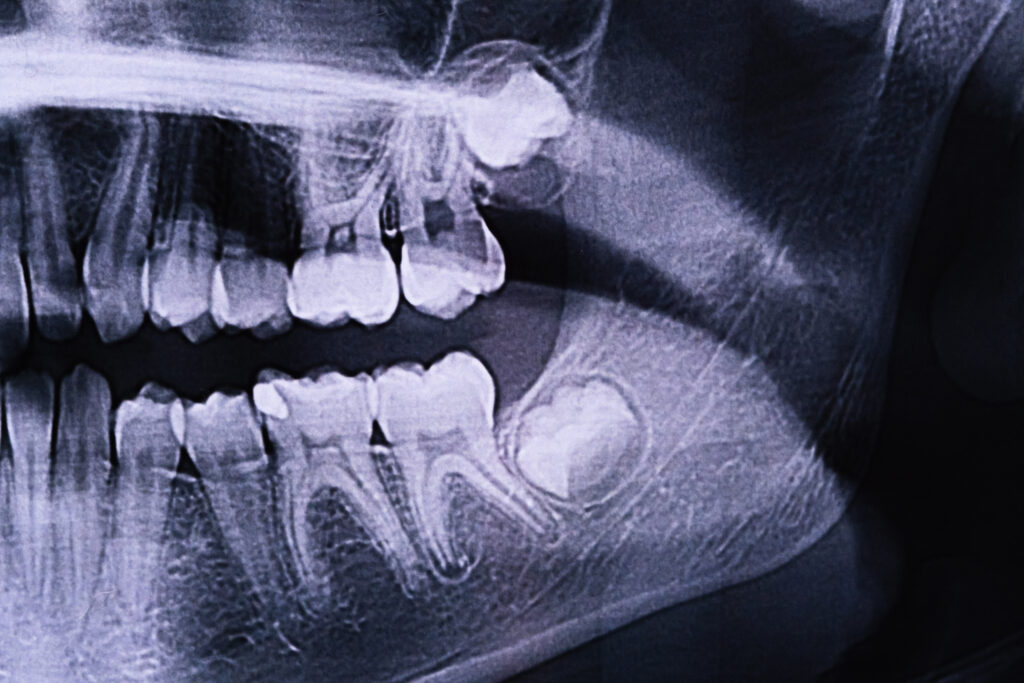
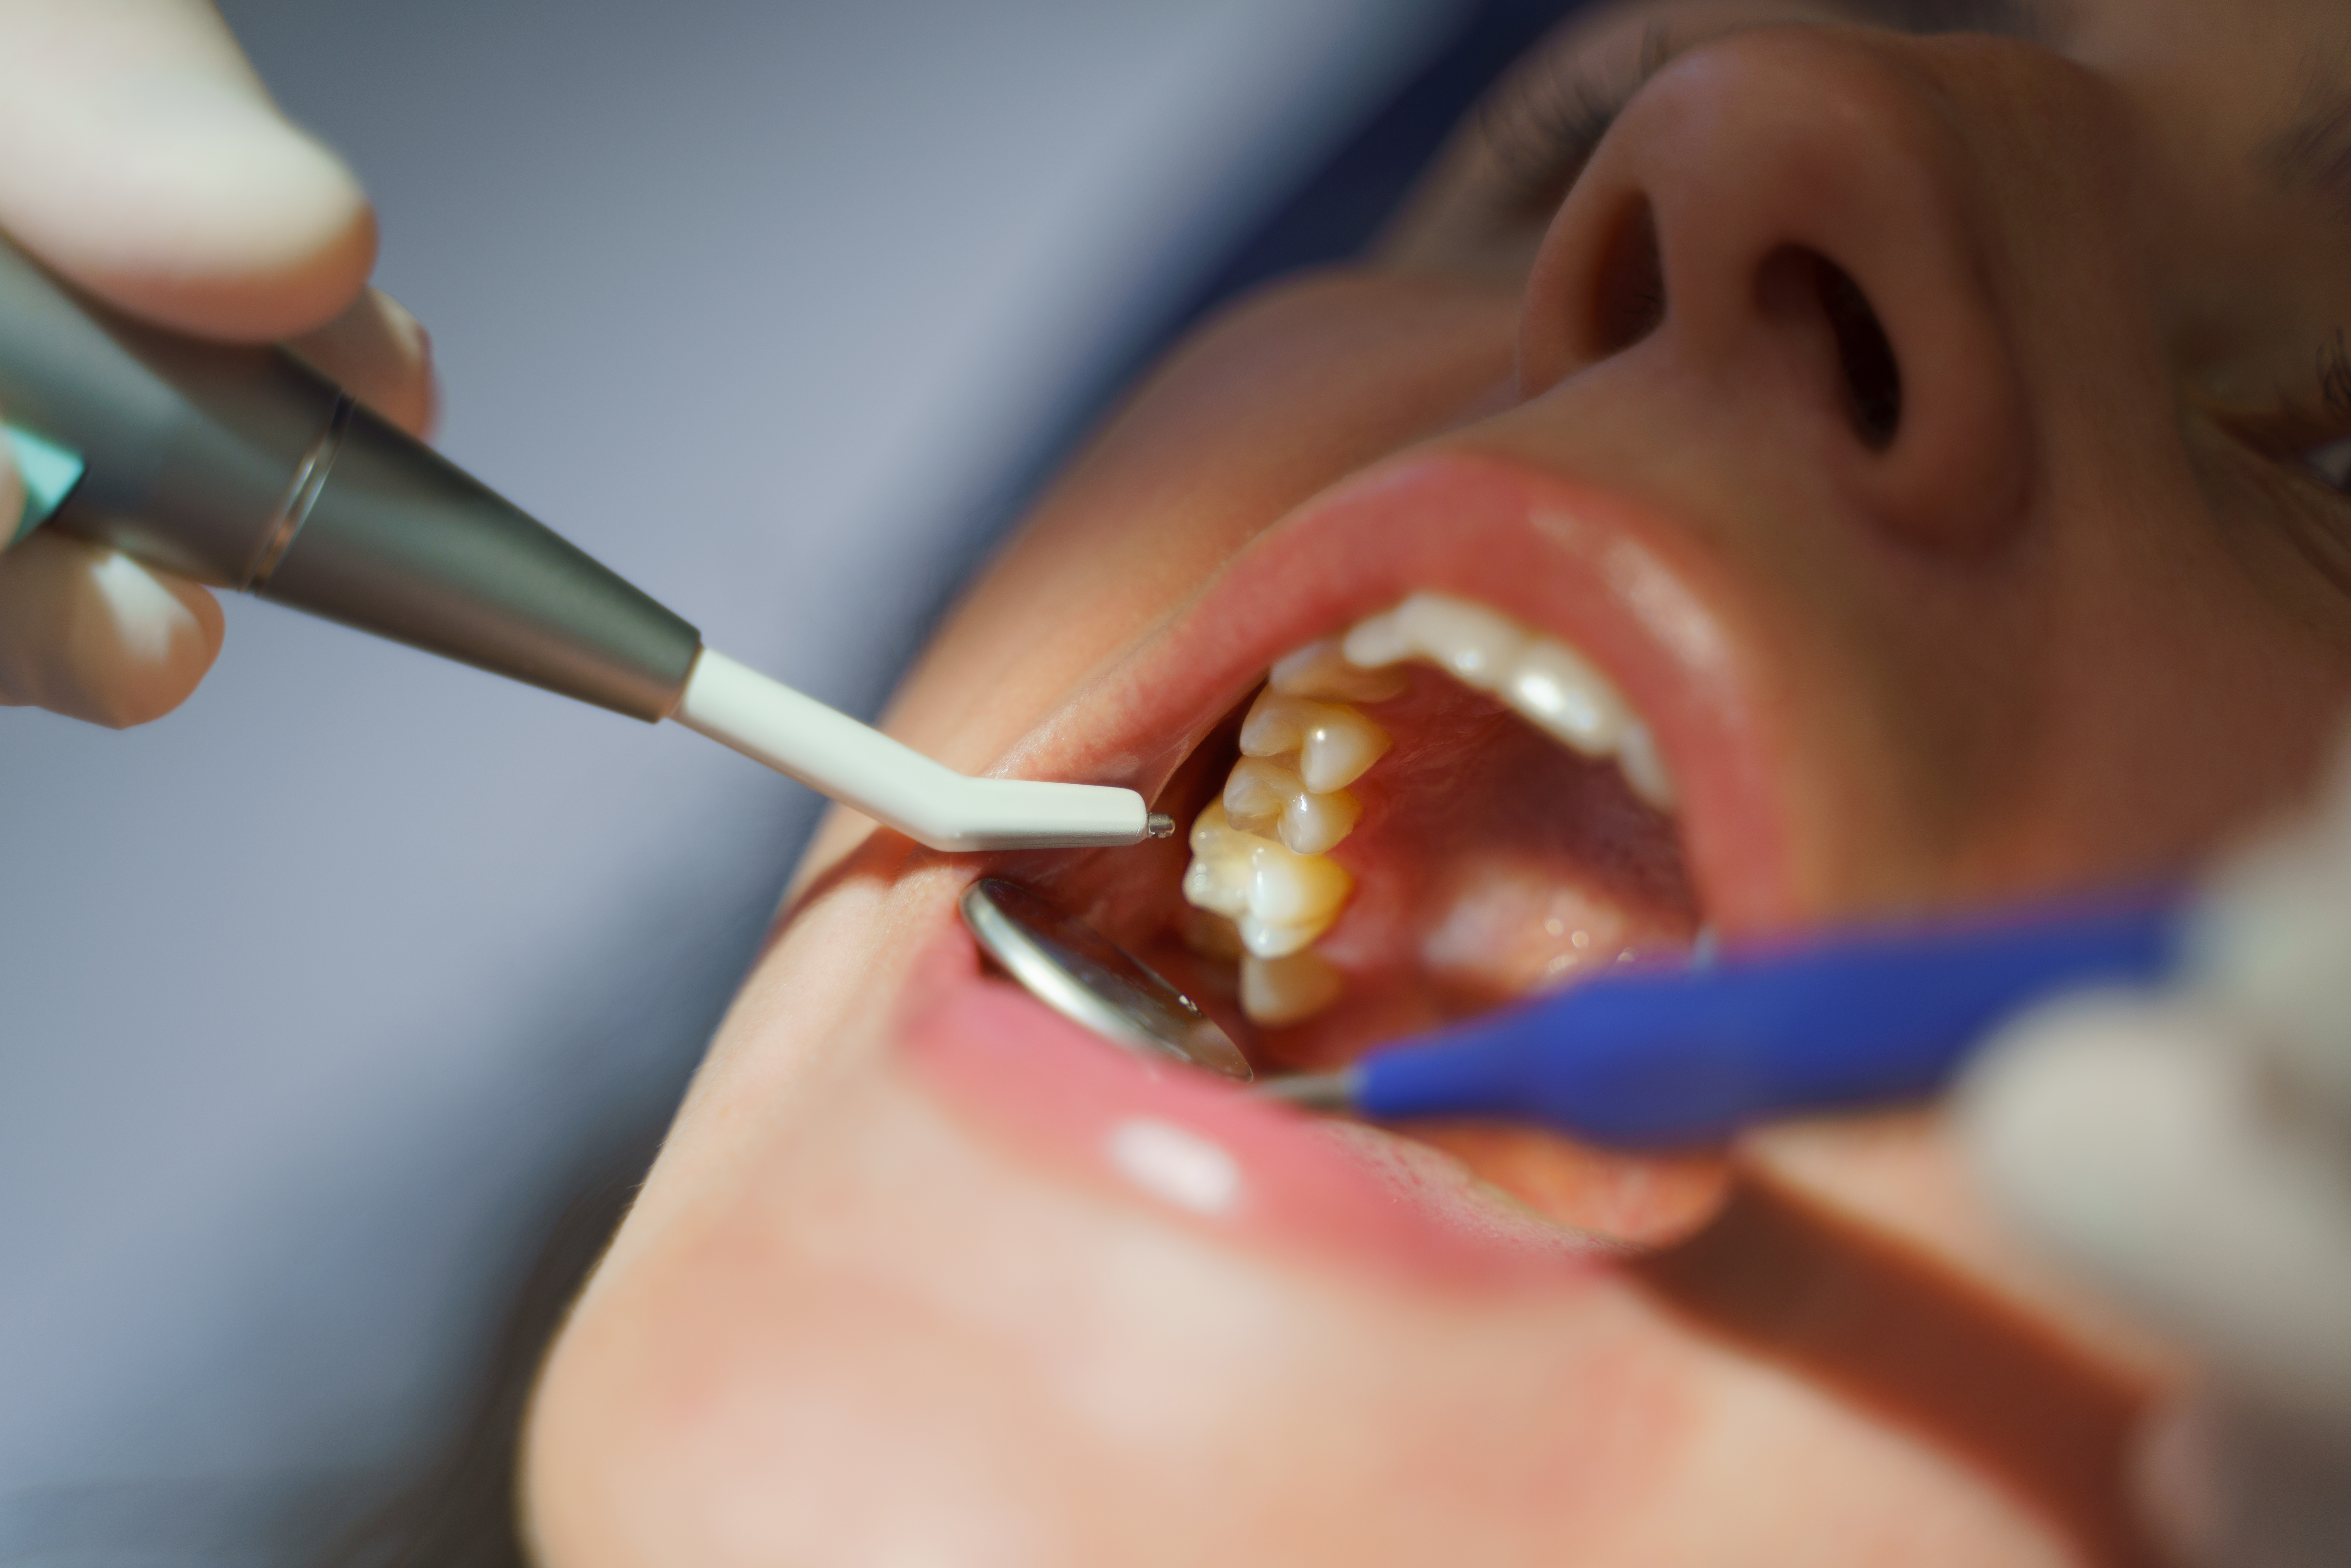
How Are Wisdom Teeth Headaches Diagnosed?

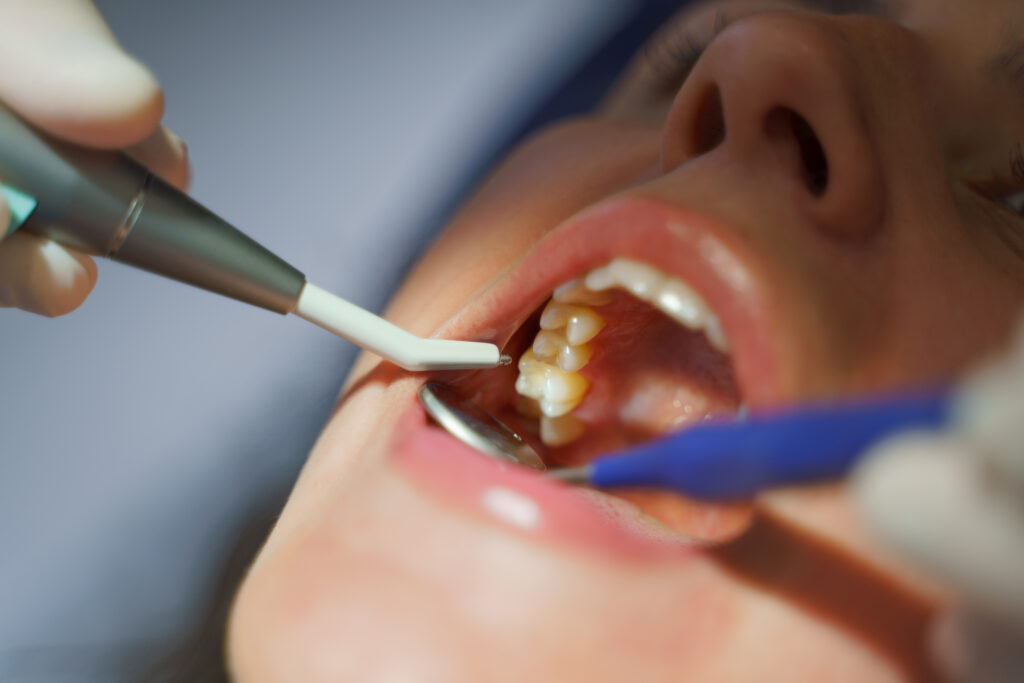
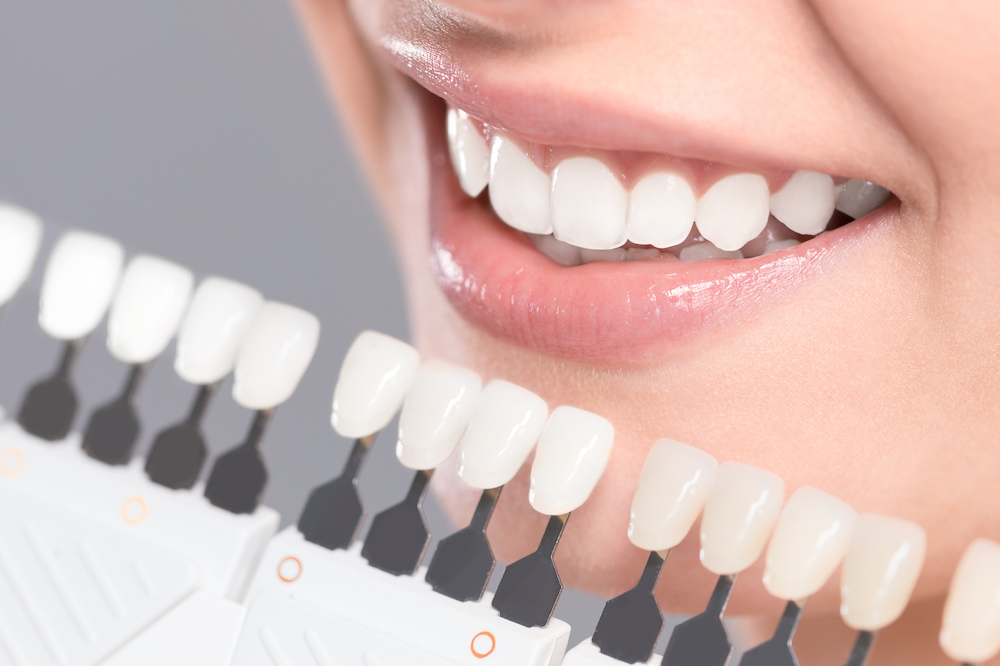
Diagnosis involves a clinical exam, panoramic X-rays, and sometimes cone-beam CT imaging to assess tooth position, nerve proximity, and bone health. These imaging techniques enable precise treatment planning, whether extraction or conservative management.

Why Is Early Intervention Important for Wisdom Teeth-Related Headaches?

Early intervention prevents complications like chronic headaches, infection, cyst formation, and TMJ damage by addressing problematic wisdom teeth before they worsen. Timely removal or management reduces the risk of extensive surgery, prolonged pain, and misalignment of adjacent teeth.

Persistent headaches linked to wisdom teeth require a clear diagnosis and targeted care to restore comfort and prevent further complications. From identifying impaction and nerve irritation to exploring infection and TMJ influences, understanding these connections empowers informed decisions. Home remedies and OTC options offer temporary relief, while professional extraction often resolves the root cause under expert care. Contact Lane & Associates Family Dentistry for personalized evaluation and lasting relief from wisdom tooth–related headaches.

** This is not medical advice, each case is uniquely different consult a trained professional  **

Panoramic X-ray of the jaw. X-ray of the teeth of a 12-year-old girl.
Share this post:

The Ultimate Guide to Better Oral Health

Keeping your teeth clean is important for your overall health. You probably know that brushing twice a day helps, but what about cleaning between your teeth? That’s where flossing comes in. Today, you have two main choices: the classic string floss or the newer water flosser. But which one works better for you?

This guide will help you understand both options. We’ll explore how each method works, their benefits and drawbacks, and which situations call for each tool. By the end, you’ll know exactly which flossing method fits your oral health needs.

Understanding the Basics of Flossing

Before we dive into comparing tools, let’s talk about why flossing matters. Your toothbrush can’t reach everything. Food particles and plaque hide between your teeth and below your gum line. When these stay there too long, they cause problems.

Plaque is a sticky film of bacteria that forms on your teeth. If you don’t remove it, it hardens into tartar. This can lead to gingivitis, which is the early stage of gum disease. Your gums become red, swollen, and may bleed when you brush or floss.

The American Dental Association recommends cleaning between your teeth once daily. This simple habit can prevent serious dental problems down the road.

What Is a Water Flosser?

A water flosser is a handheld device that shoots streams of water at your teeth and gums. Some people call it an oral irrigator or by the brand name Waterpik. The device has a water reservoir and a small tip that you point between your teeth.

How Water Flossers Work

The device pumps water through the tip in steady pulses. You can usually adjust the pressure to make it comfortable for your gums. The water stream removes food particles and plaque from areas your toothbrush can’t reach.

Most water flossers plug into the wall, but you can also find cordless models that run on batteries. The tips come in different shapes for various cleaning needs.

Benefits of Using a Water Flosser

Water flossers offer several advantages:

  • Gentle on sensitive gums: The water is softer than string floss, making it more comfortable for people with tender gums
  • Great for dental work: If you have braces, a temporary bridge, or dental bridge front teeth, water flossers clean around these devices easily
  • Reaches deep pockets: The water can get below the gum line better than traditional floss
  • Easy to use: People with arthritis or limited hand movement often find water flossers simpler to handle
  • Massages gums: The water pressure can help improve blood flow to your gums
  • Reduces gingivitis: Studies show water flossers can help reduce gum inflammation

Drawbacks of Water Flossers

However, water flossers have some downsides:

  • Higher cost: They cost more upfront than string floss
  • Need counter space: The device takes up room in your bathroom
  • Requires electricity: You need an outlet nearby
  • Can be messy: Water might splash around your sink
  • Not as portable: Harder to travel with than string floss

Happy woman, teeth and dental floss in cleaning, hygiene or cosmetics against a blue studio backgro.

Understanding String Floss

String floss, also called dental floss, is the traditional way to clean between teeth. It’s a thin thread that you wrap around your fingers and guide between your teeth.

How String Floss Works

You take about 18 inches of floss and wrap most of it around your middle fingers. Using your thumbs and index fingers, you guide the floss between your teeth. You curve it into a C-shape around each tooth and gently move it up and down.

String floss comes in different types:

  • Waxed: Slides easier between tight teeth
  • Unwaxed: Some people prefer the feel
  • Flavored: Mint or other flavors make flossing more pleasant
  • Tape: Wider and flatter, good for people with gaps between teeth

Benefits of String Floss

String floss has several advantages:

  • Inexpensive: Very affordable compared to water flossers
  • Portable: Easy to carry anywhere
  • No setup needed: Ready to use anytime
  • Effective cleaning: Physically scrapes plaque off teeth
  • Widely available: You can buy it almost anywhere
  • No electricity required: Works anywhere, anytime

Drawbacks of String Floss

String floss also has some challenges:

  • Requires technique: Takes practice to do it correctly
  • Can cut gums: Rough handling might cause bleeding
  • Hard for some people: Difficult if you have arthritis or limited mobility
  • Tough with dental work: Harder to use with braces or bridges
  • Can break: Sometimes snaps between tight teeth

Water Flosser vs String Floss: Head-to-Head Comparison

Let’s compare these two methods across different factors that matter most to your oral health.

Effectiveness at Removing Plaque

Both methods remove plaque, but they work differently. String floss physically scrapes plaque off your teeth. It’s very effective at removing the sticky buildup from tooth surfaces.

Water flossers use water pressure to flush out loose particles and bacteria. They’re particularly good at cleaning below the gum line and in hard-to-reach areas.

Research shows that both methods reduce gingivitis when used properly. However, water flossers may have a slight edge for reducing gum inflammation.

Ease of Use

Water flossers win when it comes to ease of use. You simply point and spray. This makes them great for:

  • Children who are learning to floss
  • Elderly people with limited hand movement
  • Anyone with arthritis or other mobility issues
  • People who find string floss frustrating

String floss requires more skill and coordination. You need to learn the proper technique to avoid injuring your gums.

Cost Comparison

String floss is much cheaper upfront. A pack costs just a few dollars and lasts for months. Water flossers range from $30 to over $100, plus you’ll need replacement tips.

However, consider the long-term value. If a water flosser helps you floss regularly when you wouldn’t otherwise, it could save you money on dental treatments.

Best for Different Dental Conditions

Different oral health situations call for different tools:

Water flossers work best for:

  • People with braces
  • Those with temporary bridge or permanent bridges
  • Anyone with deep gum pockets
  • People with sensitive or inflamed gums
  • Those who struggle with traditional flossing technique

String floss works best for:

  • People with very tight spaces between teeth
  • Those who travel frequently
  • Anyone on a tight budget
  • People who prefer the “scraping” feeling of thorough cleaning

Addressing Common Concerns

Can Waterpik Cause Gum Recession?

This is a common worry. When used correctly, water flossers don’t cause gum recession. In fact, they may help prevent it by reducing gum inflammation.

However, using too much pressure or holding the tip too close to your gums could potentially cause problems. Always start with the lowest pressure setting and gradually increase as your gums get used to the sensation.

If you notice any gum irritation or recession, lower the pressure or talk to your dentist.

Are Water Flossers Safe for Everyone?

Water flossers are generally safe for most people. They’re especially helpful for those with:

However, if you have specific dental conditions or concerns, check with your dentist before starting any new oral care routine.

When Im not flexing, Im flossing. Cropped shot of an unrecognizable man holding dental floss

Making the Right Choice for You

Choosing between a water flosser and string floss depends on your specific needs. Consider these factors:

Choose a Water Flosser If You:

  • Have dental work like braces, bridges, or implants
  • Struggle with traditional flossing technique
  • Have mobility issues that make string floss difficult
  • Experience bleeding or sensitive gums with string floss
  • Want something that feels gentler on your gums
  • Don’t mind the higher upfront cost

Choose String Floss If You:

  • Travel frequently and need something portable
  • Have very tight spaces between teeth
  • Prefer the thorough scraping feeling
  • Want the most affordable option
  • Have limited counter space in your bathroom
  • Don’t have access to electricity where you floss

Consider Using Both

You don’t have to choose just one method. Many dental professionals suggest using both tools for optimal oral health. You might use string floss for thorough plaque removal and a water flosser for gentle gum massage and hard-to-reach areas.

Tips for Success with Either Method

Regardless of which tool you choose, these tips will help you get the best results:

For Water Flosser Users:

  • Start with the lowest pressure setting
  • Point the tip at a 90-degree angle to your gum line
  • Work systematically around your mouth
  • Don’t forget the back teeth
  • Replace tips every 3-6 months
  • Clean your water reservoir regularly

For String Floss Users:

  • Use about 18 inches of floss
  • Wind most of it around your middle fingers
  • Use gentle up-and-down motions
  • Curve the floss around each tooth
  • Use a clean section for each tooth
  • Don’t snap the floss into your gums

Describing what plaque looks like in a picture of teeth

The Bottom Line on Oral Health

Whether you choose a water flosser, string floss, or both, the most important thing is consistency. Cleaning between your teeth daily makes a huge difference in your oral health.

Remember that flossing is just one part of good oral hygiene. You also need to:

  • Brush your teeth twice daily for two minutes
  • Use fluoride toothpaste
  • Visit your dentist regularly for checkups and cleanings
  • Consider using mouthwash for extra protection

Get Professional Guidance at Lane and Associates

Choosing the right oral care tools can feel overwhelming. That’s where professional guidance makes all the difference. At Lane and Associates, our experienced dentists and hygienists can evaluate your specific oral health needs and recommend the best flossing method for you.

We understand that every patient is unique. Whether you have a temporary bridge, dental bridge front teeth, sensitive gums, or just want to prevent gingivitis, we’ll create a personalized oral care plan that works for your lifestyle and budget.

Our team stays current on the latest dental research and products. We can show you proper techniques for both water flossers and string floss, helping you get the best results from whichever method you choose.

Don’t let uncertainty about oral care hold you back from a healthy smile. Schedule an appointment with Lane and Associates today. We’ll help you build an oral hygiene routine that keeps your teeth and gums healthy for years to come.

Your smile is worth the investment. Let us help you protect it with the right tools and techniques for your unique needs.

Share this post:

dental bridge

When it comes to replacing missing teeth, dental bridges are a popular, effective option. But just how long can you expect a dental bridge to last? This is a question many patients ask when considering their restorative dental options. At Lane & Associates Family Dentistry, we’re committed to providing durable, high-quality dental bridges that not only enhance your smile but also restore functionality. Based on careful maintenance and lifestyle factors, dental bridges can serve you well for many years.

Whether you’re researching dental bridges for yourself or a loved one, this comprehensive guide will help you understand their lifespan, proper care, and the advantages they provide.

What Is a Dental Bridge?

A dental bridge serves as a replacement for one or more missing teeth. It “bridges” the gap created by the missing tooth with a false tooth (known as a pontic), which is anchored in place by surrounding teeth or dental implants. The bridge itself can be made from a variety of materials, including:

  • Porcelain
  • Zirconia
  • Alloys (like gold)
  • A combination of porcelain and metal

This versatility allows the dental team at Lane & Associates Family Dentistry to tailor the bridge to match your specific needs, ensuring it blends seamlessly with your natural teeth.

For more detailed information about our restorative dentistry options, check out our restorative dentistry services.


How Long Do Dental Bridges Typically Last?

Most dental bridges last between 10 to 15 years with proper care. However, longevity can depend on several factors, such as:

  1. Oral Hygiene Maintenance

Brushing and flossing regularly, as well as visiting the dentist for routine cleanings, can significantly extend the lifespan of your bridge. Neglecting oral hygiene may lead to decay in the supporting teeth (abutments), weakening the structure of the bridge.

  1. Dietary Habits

Consuming hard or sticky foods can wear down or damage dental bridges over time. Keeping a balanced diet that avoids overly sugary or crunchy foods can help ensure the durability of your bridge.

  1. Bite Force and Usage

Excessive bite force due to teeth grinding (bruxism) or clenching can accelerate the wear and tear of dental bridges. If you grind your teeth, your Lane DDS dentist may recommend a custom nightguard for added protection.

  1. Material Quality

The longevity of dental bridges can also depend on the material used. Gold and alloy are known for their durability, while porcelain provides an aesthetic advantage but may be more susceptible to damage over time.

Our dentists at Lane & Associates will work with you to select the best material and design for your personalized dental bridge.

Tip: Regular checkups can help catch any issues with your bridge early. Learn more about our general dentistry services for comprehensive care options.


Dental proceduredental exam

Do Dental Bridges Need Replacement?

Yes, dental bridges may need replacement after 10-15 years, depending on their condition and your oral health. Some common reasons for replacing a dental bridge include:

  • Tooth Decay under the abutment teeth
  • General Wear and Tear, such as chips or fractures
  • Improper Fit due to shifting teeth
  • Gum Recession, which affects the stability of the bridge

If you notice your bridge feels loose or uncomfortable, it’s time to see a dentist. Quick action can often save the existing structure without needing a full replacement.

Need a consultation? Visit one of our Lane DDS locations throughout North Carolina!


Can Dental Bridges Fall Out?

While dental bridges are securely bonded to the supporting teeth or implants, they can fall out under certain circumstances, such as:

  • Significant decay in the abutment teeth
  • Breakdown of the bonding material
  • Changes in bite alignment

Should your bridge fall out, take the following steps immediately:

  1. Preserve the Bridge – Keep the bridge safe and clean; don’t attempt to fix it yourself.
  2. Schedule an Appointment Quickly – Contact Lane & Associates Family Dentistry to get it examined promptly.
  3. Temporary Measures – Avoid chewing on that side of your mouth until the bridge is professionally reattached.

Same-day care is particularly important for front teeth to maintain your appearance. Contact your nearest office via our locations page.


Dental Implants


Dental Bridges vs. Implants: Which Lasts Longer?

When it comes to durability, dental implants generally last longer than bridges. Implants are often considered a permanent solution, with a lifespan of 20+ years when properly cared for. Here’s how the two compare:

Feature

Dental Bridge

Dental Implant

Lifespan

10-15 years

20+ years

Jawbone Preservation

No

Yes

Cost

Lower upfront cost

Higher initial cost

Maintenance

Requires cleaning around abutments

More extensive daily care

At Lane DDS, we evaluate your overall health and dental goals to recommend the most suitable tooth replacement option. If you’re interested in implants, explore our dental implant services.


Are Dental Bridges Worth It?

Absolutely! Dental bridges are a reliable and cost-effective way to replace missing teeth. Benefits include:

  • Restoration of Chewing & Speaking – Bridges function like natural teeth, making it easier to enjoy your favorite meals and speak clearly.
  • Prevention of Shifting Teeth – Filling the gap left by missing teeth prevents adjacent teeth from moving, which could result in bite problems.
  • Preservation of Facial Shape – Bridges help reduce bone loss in the jaw and maintain the structure of your face.
  • Aesthetic Improvement – Modern bridges are designed to mimic the look of natural teeth, leaving you with a confident, radiant smile.

Still undecided? Visit Lane & Associates Family Dentistry for a consultation today! With offices across North Carolina, high-quality dental care has never been so accessible.


Maintaining Your Dental Bridge

Follow these tips to extend the life of your dental bridge:

  • Brush twice daily using fluoride toothpaste.
  • Floss around the bridge and abutment teeth with a floss threader or interdental brush.
  • Rinse with an antibacterial mouthwash to reduce plaque buildup.
  • Visit your dentist every six months for cleanings and assessments.

By prioritizing these practices, you can ensure that your dental bridge stays functional and beautiful for years to come.


Office Exteror


Take the Next Step

Whether you’re missing a single tooth or several, a dental bridge might be the perfect solution for you. At Lane & Associates Family Dentistry, we combine decades of expertise with advanced technology to offer tailor-made restorative treatments.

Contact us today or schedule your visit to one of our North Carolina offices conveniently located near you! Our friendly and knowledgeable dental team is ready to help you achieve the smile you deserve.

Share this post:

dental bridge

When you think about restoring your smile after tooth loss, dental bridges quickly surface as a popular solution. But many questions often arise—chief among them being cost. Are dental bridges expensive? The answer depends on several factors, including the type of bridge, the materials used, and whether or not you have dental insurance.

At Lane & Associates Family Dentistry, our goal is to provide patients across North Carolina with top-notch dental care, including affordable options for restorative treatments like dental bridges. This guide explores everything you need to know about the costs, materials, and insurance coverage for dental bridges.

What Are Dental Bridges?

A dental bridge is a prosthetic device designed to replace one or multiple missing teeth. It literally “bridges” the gap by anchoring securely to adjacent teeth, called abutments. These abutments serve as support for the bridge, which typically includes one or more false teeth called pontics.

Dental bridges not only restore the aesthetics of your smile but also improve oral functionality by making biting and chewing easier. At Lane DDS, our experienced dentists ensure dental bridges fit seamlessly and look as natural as your original teeth.

Types of Dental Bridges

Understanding the types of dental bridges can help you select the best option for your needs and budget. Common types include:

  1. Traditional Bridges

Anchored by crowns placed on the adjacent teeth, traditional bridges are durable and typically replace one or more teeth.

  1. Cantilever Bridges

Cantilever bridges are supported by a single abutment tooth when a second supporting tooth isn’t available.

  1. Maryland Bridges

These bridges use a metal or porcelain framework bonded to the back of the adjacent teeth. They are often ideal for replacing front teeth.

  1. Implant-Supported Bridges

This type utilizes dental implants rather than natural teeth as support, offering unparalleled durability and longevity.

Explore more about restorative dentistry options restorative dentistry services.

dentist

How Much Do Dental Bridges Cost?

The cost of dental bridges varies significantly based on type, materials, and additional factors such as location and insurance coverage. Here’s a general breakdown of costs to give you an idea of what to expect:

  • Traditional Bridges: $2,000–$5,000 per bridge
  • Maryland Bridges: $1,500–$2,500
  • Cantilever Bridges: $2,000–$2,700
  • Implant-Supported Bridges: $5,000–$15,000

Factors Affecting Cost

Several factors influence the overall price of dental bridges, including:

  • Materials Used

Bridges made from all-porcelain or zirconia are costlier than those made with porcelain fused to metal. However, they also provide a more natural appearance.

  • Number of Missing Teeth

The more teeth you need to replace, the higher the cost.

  • Type of Bridge

More complex procedures, like implant-supported bridges, tend to be more expensive due to additional surgical requirements.

  • Location

Local dental service prices and the availability of resources can impact costs.

Need personalized pricing? Visit one of our North Carolina locations for a consultation. Check our office locations our North Carolina office locations.

Does Insurance Cover Dental Bridges?

Yes, many dental insurance plans cover a portion of the cost of dental bridges. Standard coverage often ranges between 50%-70%, but this depends on your insurance provider and policy.

It’s important to verify whether your plan covers pre-existing conditions or includes waiting periods for restorative procedures. At Lane DDS, our team is happy to assist you in understanding your financial options. Click financial options and insurance details for more information about financial arrangements and insurance.

Dental Implants

Dental Bridges vs. Dental Implants

A common question we hear is whether dental bridges are less expensive than dental implants. Generally, the answer is yes; dental bridges are typically more affordable upfront. However, bridges have a lifespan of 5–15 years, whereas dental implants can last a lifetime with proper care. Implants also eliminate the need to alter adjacent healthy teeth, making them a long-term investment.

Still debating between the two? Learn more about our implant dentistry services dental implant services.

Are Dental Bridges Affordable Without Insurance?

Without insurance, dental bridges can appear expensive as you shoulder costs for the device, placement, and any necessary additional treatments (e.g., X-rays or tooth extractions).

At Lane & Associates, we understand the financial concerns many patients face. That’s why we offer flexible payment options and financing plans to help you achieve your dental goals without overwhelming your budget.

Want to know more about our affordability programs? Contact us today to discuss your options.

Why Choose Lane & Associates for Dental Bridges?

Lane & Associates Family Dentistry has proudly served North Carolina communities for over 40 years. With skilled professionals, state-of-the-art technology, and a compassionate approach, we make dental care accessible and reliable.

We operate multiple convenient locations across North Carolina, ranging from Raleigh to Fayetteville. Each office is equipped with highly trained staff ready to provide exceptional care. Find the nearest office to you here.

Portrait of beautiful woman cleaning teeth with dental floss.

Maintaining Your Dental Bridge

Proper maintenance extends the life of your dental bridge while safeguarding the health of adjacent natural teeth. Follow these tips for optimal oral hygiene with a dental bridge:

  • Brush twice daily with fluoride toothpaste
  • Floss daily, incorporating floss threaders to clean under the bridge
  • Visit your dentist regularly for exams and professional cleanings

Our dentists at Lane DDS are passionate about ensuring the longevity of your dental treatment. Whether it’s maintenance tips or a routine check-up, we’re here to help! Schedule your appointment schedule your appointment today.

Final Thoughts

While dental bridges can involve an investment, their value lies in restoring your smile, improving bite functionality, and preventing further oral health issues. Lane & Associates Family Dentistry is your partner in achieving a confident, healthy smile—at a budget that works for you.

Share this post:

A healthy smile is more than just an aesthetic goal; it’s a crucial part of your overall well-being. However, one of the most common oral health challenges many people face is tartar buildup. Also known as calculus, tartar can lead to gum disease, cavities, and other dental problems if not addressed.

With the growing popularity of water flossers, many wonder if these handy devices can remove tartar. Short answer? Not exactly—but they’re still an important part of your oral care arsenal. Read on to learn everything about tartar, water flossers, and how you can maintain a pristine smile.

dental cleaning

What Is Tartar and Why Is It a Problem?

Tartar is a hardened form of dental plaque that clings stubbornly to your teeth and gumline. It develops when plaque, a sticky film of bacteria, combines with food particles and minerals in your saliva. If you don’t remove plaque promptly through proper brushing and flossing, it calcifies into tartar.

Why is this a big deal? Tartar isn’t just unsightly; it can wreak havoc on your oral health. Beyond the yellowish or brownish look it gives your teeth, tartar creates a rough surface that attracts more plaque and bacteria. This can irritate your gums, leading to gum disease, bad breath, and even tooth loss in severe cases.

The tough nature of tartar means you can’t brush or floss it away once it forms. Removing it requires the tools and expertise of a professional dentist.

The Science Behind Tartar Formation

Understanding how tartar forms helps illustrate why prevention is so critical. The process starts with plaque, which is made up of bacteria constantly forming on your teeth. The bacteria feed on sugars and starches from food, producing acids that can harm enamel and irritate gums.

If plaque isn’t removed within 24–72 hours, it hardens into tartar due to the presence of minerals in your saliva. Once tartar forms, it adheres tightly to your teeth and gumline, making it impossible to remove with at-home tools.

Tartar can form in hard-to-reach areas, like the back of your teeth or between them, which emphasizes the importance of thorough oral hygiene.

water flosser in use

Do Water Flossers Remove Tartar?

Water flossers, like the popular Waterpik, are often marketed as a user-friendly alternative to traditional flossing. They use a pressurized stream of water to clean between your teeth and along your gumline. While water flossers are effective at dislodging food particles and softening plaque, they cannot remove tartar.

Tartar is essentially hardened plaque that’s bonded to your tooth surface. No matter how strong the water stream, once plaque becomes tartar, it’s there to stay until removed professionally.

Here’s the good news: Water flossers can help prevent tartar by reducing the plaque that leads to it. When used consistently and correctly, they can be an excellent addition to your daily oral care routine.

The Unique Benefits of Water Flossers

While they can’t eliminate tartar, water flossers offer plenty of benefits that make them worth including in your routine. Here’s how they stand out:

1. Gentle on Sensitive Teeth and Gums

If you have sensitive teeth, receding gums, or existing gum disease, traditional flossing may feel uncomfortable. Water flossers provide a gentler way to clean without causing irritation.

2. Effective for Braces and Dental Work

Traditional flossing can be a challenge if you have braces, bridges, or dental implants. Water flossers make it easier to clean around brackets, wires, and other tricky areas, helping you maintain good hygiene.

3. Prevents Plaque Accumulation

By rinsing away food particles and soft plaque, water flossers reduce the risk of plaque hardening into tartar. They’re particularly helpful for cleaning along the gumline, where plaque often starts to accumulate.

4. Improves Gum Health

Some studies show that water flossers are as effective as traditional floss in reducing gum inflammation and bleeding. The pulsing water stream can massage the gums, improving blood circulation and overall gum health.

waterpik vs flossing

How to Use a Water Flosser for Best Results

To get the most out of your water flosser, follow these simple steps:

  1. Fill the Reservoir
    Add lukewarm water to the device’s reservoir. For added benefits, you can mix in a mouthwash approved by your dentist.
  2. Adjust the Pressure
    Start on a low setting and gradually increase the pressure as you get used to the feeling. If you have sensitive gums, stick with gentle pressure.
  3. Aim Carefully
    Lean over the sink to avoid splashing, hold the flosser perpendicular to your gumline, and trace each tooth. Spend extra time on hard-to-reach areas.
  4. Clean Consistently
    Use your water flosser once a day, preferably before bedtime, to remove debris from the day.

Remember, while water flossers are a handy tool, they should complement—not replace—brushing and traditional flossing.

Preventing Tartar Formation at Home

The best way to combat tartar is to stop it in its tracks. Here’s your game plan for keeping your teeth and gums healthy and tartar-free:

  • Brush Thoroughly
    Use a soft-bristled toothbrush and fluoride toothpaste. Brush at least twice a day for two minutes, focusing on all tooth surfaces and the gumline.
  • Floss Regularly
    Whether you choose string floss, picks, or a water flosser, cleaning between your teeth removes plaque from areas your toothbrush can’t reach.
  • Rinse Effectively
    Use an antiseptic or fluoride mouthwash to help eliminate bacteria and strengthen enamel.
  • Mind Your Diet
    Reduce sugary and starchy foods that feed bacteria. Include crunchy fruits and veggies like apples and carrots, which can help scrub plaque naturally.
  • Don’t Skip Dental Appointments
    Regular professional cleanings are crucial for removing tartar and spotting dental issues early.

Dentist cleaning teeth

Why Professional Cleanings Are Non-Negotiable

Once tartar forms, the only way to remove it is through a professional cleaning. During the procedure, a skilled dentist or hygienist will use special tools to carefully scrape away tartar from above and below your gumline.

Professional cleanings not only prevent gum disease and cavities but also give your teeth a smoother surface, making it harder for plaque to stick moving forward.

Experience Top-Notch Care at Lane and Associates

If you’ve noticed signs of tartar buildup, such as discoloration, rough spots, or bleeding gums, it’s time to book a dental appointment. At Lane and Associates Family Dentistry, we specialize in keeping smiles healthy and happy. With over 40 years of experience, our team offers gentle, personalized care for everything from routine cleanings to advanced treatments.

We use the latest techniques to remove tartar effectively and make recommendations to improve your routine at home. With multiple locations across North Carolina, excellent dental care has never been more convenient.

Take Charge of Your Oral Health

While water flossers can’t remove tartar, they shine as a tool for preventing it. Combined with good brushing habits, regular flossing, and professional cleanings, they help pave the way for a lifetime of healthy smiles.

Are you overdue for a dental cleaning? Contact Lane and Associates today to schedule your appointment. We’re here to give you the care and guidance you need to keep your teeth and gums in top shape!

Raleigh Wake Forest Rd Office Exterior WEB

Contact Lane and Associates Today For Tartar Removal

Schedule Your Visit

Call us at 1-877-LANE-DDS or visit our website to find the Lane and Associates location nearest you. Your brighter, healthier smile starts here! If you have noticed that plaque has begun to calcify on your teeth, contact Lane and Associates today to schedule a professional dental cleaning and tartar removal. Our experienced dentists will use the latest techniques and tools to remove any calculus buildup and help you maintain good oral health. We have offices located across North Carolina. Don’t wait, call us today!

Share this post:

If you’ve recently started using whitening strips or considering them, one question probably comes up a lot: Should you brush your teeth after using them? The short answer? It depends. But don’t worry—we’ll break it all down for you, so you get the best results from your whitening routine while keeping your smile healthy and bright.

We’ll also share a few extra tips for getting the most out of teeth whitening and maintaining good oral hygiene. And remember, if you want professional results or advice, a visit to Lane & Associates Family Dentistry is always a smart move!

Woman smiling with bright white teeth next to shades of tooth colors at the dental office


How Long Should You Wait To Brush Your Teeth After Whitening Strips?

Most dental experts recommend waiting 30 minutes before brushing your teeth after using whitening strips. Why, you ask? Whitening strips contain active ingredients like hydrogen peroxide or carbamide peroxide that penetrate the enamel to lift stains. Brushing too soon can disrupt this process and might even remove some of the whitening gel. Worse, scrubbing right after can irritate your teeth and gums, especially if you’ve got some sensitivity.

What If You Can’t Wait?

If you feel the need to clean your teeth after using strips, rinsing with water can be a good middle ground. A simple rinse can flush away any leftover gel without interfering with the whitening agents or causing irritation.

Brushing Before or After Whitening Strips?

Another common question is: Should you brush before or after using whitening strips? Here’s what we recommend:

Brushing Before

Brushing beforehand clears away plaque and debris, giving the whitening strips direct access to your enamel. This step makes the treatment more effective and helps ensure even results. Just make sure to wait a few minutes after brushing before applying the strips, as this gives your saliva time to naturally protect your teeth.

Brushing After

If you prefer brushing after whitening, remember to follow the 30-minute rule. Opt for a soft-bristled toothbrush and non-abrasive toothpaste to avoid irritation, especially if you’re prone to sensitivity.

Above all, always follow the directions provided on the packaging for your particular whitening strips. Some brands may have their own unique instructions.

Dental care

Morning or Night? When’s the Best Time To Use Whitening Strips?

Deciding between morning or night comes down to personal preference and your daily routine. Here are a few things to keep in mind:

  • Morning Users: If you like starting your day with a fresh, bright smile, morning is a great time. Just avoid eating or drinking anything (except water) immediately afterward to keep your teeth stain-free.
  • Night Owls: Using strips at night can be more convenient if you’re winding down and won’t be snacking or sipping coffee afterward. It gives the whitening agents more uninterrupted time to set.

There’s no universal “best” time; consistency is what truly matters for achieving a gleaming smile.

Tips for Safer Whitening at Home

Whitening strips are a popular at-home solution, but it’s essential to use them carefully. Here are some tips for a safe and effective whitening experience:

  1. Follow the Instructions: Read and stick to the guidelines on your specific product. Overusing whitening strips won’t speed up results and can actually harm your enamel.
  2. Manage Sensitivity: If you experience sensitivity while whitening, try skipping days between treatments or using a toothpaste designed for sensitive teeth.
  3. Protect Your Gums: Be careful not to overlap the strips onto your gums, as this can cause irritation or redness.
  4. Combine with Professional Advice: If you’re unsure whether whitening strips are right for you, consult a dentist. At Lane & Associates, our team can recommend products or treatments tailored to your needs.

Teeth Whitening Systems

Why Professional Whitening Could Be Your Best Bet

While whitening strips are convenient and budget-friendly, they might not deliver the same results as professional treatments. That’s where a dentist can come in handy! Lane & Associates offers professional whitening options that are both safe and highly effective. With treatments administered by dental experts, you can enjoy a dazzling smile with minimal sensitivity or irritation.

Professional cosmetic dentistry and whitening also allows us to target stubborn stains, discoloration caused by factors like coffee, wine, smoking and other imperfections. Plus, we can make recommendations on how to maintain your white smile long-term.

Maintain a Radiant Smile Year-Round

Whitening your teeth is just the first step. Keep your smile looking its best with these easy tips:

  • Maintain good oral hygiene and brush twice a day with a fluoride toothpaste.
  • Floss daily to remove plaque that toothbrushes can’t reach.
  • Limit stain-causing foods and beverages like coffee, tea, and red wine.
  • Visit your dentist regularly for cleanings and check-ups.

At Lane & Associates Family Dentistry, we’re here to help with all your dental needs—from routine care to advanced cosmetic treatments. If you’re ready to upgrade your smile, why not book a visit today?

Exterior Office

Schedule Your Appointment Today!

Taking care of your teeth is about more than just whitening. It’s about maintaining good oral health so your smile stays vibrant and healthy for years to come. Have questions or need professional whitening? Lane & Associates Family Dentistry has locations across North Carolina to serve you.

Book your appointment today and take the first step toward your best, brightest smile! Call 1-877-LANE-DDS or use our online contact form to find a location near you.

Your dazzling smile is just one visit away.

Share this post:

Going to the dentist can bring up all sorts of questions, especially when it comes to the feeling you’re left with after a procedure. That “rubber-face” sensation, the slurred speech, the unintentional biting of your cheek or tongue without even realizing it—we’ve all been there.

But what’s really happening when your dentist numbs your mouth, and how long will it take to feel normal again? This guide breaks it all down for you, whether you’re getting ready for treatment or just curious to learn more. Plus, we’ll share why Lane & Associates Family Dentistry is the perfect place to make your dental care stress-free and pleasant.


novocaine needle


How Long Will Numbing Last?

The short answer? Dental numbness typically lasts 1 to 3 hours, but it can sometimes stick around for 4 to 6 hours depending on a few factors. These include:

  • The type of anesthetic your dentist used
  • The location of the injection
  • Your age, weight, and overall health
  • How quickly your body metabolizes the anesthetic

For example, certain anesthetics, like those used during root canals or tooth extractions, are designed to last longer to get you through lengthier procedures.

However, if it feels like the numbness is wearing off too slowly or it persists beyond 24 hours, that’s your cue to call the dentist for a quick check-in.

At Lane & Associates, we assess every patient carefully and tailor the type and amount of anesthesia to fit your needs perfectly. Your comfort and safety always come first!

Does It Ever Go Away Faster?

Yes! Your body will naturally metabolize the anesthetic over time, but your recovery can sometimes be sped up. More on that in the post-procedure care tips below!


The Science Behind Local Anesthesia

Ever wonder how local anesthesia actually works? The secret lies in how it interacts with your nervous system. Before getting into the nitty-gritty, think about what normally happens when you feel pain. Your brain gets signals from your nerves—for example, “Ouch, I just banged my elbow.”

Local anesthesia temporarily blocks those signals from traveling to your brain. Essentially, it disrupts the communication between the affected nerves and your brain, keeping you pain-free while your dentist works.

Types of Local Anesthesia

There are two main kinds of local anesthetics used during dental visits:

  1. Topical Anesthesia
    This is applied directly to the surface of your gums, usually with a gel or spray, to numb the area before an injection. It minimizes the sting from the needle.
  2. Injectable Anesthesia
    This is the more common type for procedures like fillings or extractions. Injected directly near the nerve, it blocks sensations in the surrounding area until the procedure is complete.

Science aside, isn’t it amazing how far dentistry has come? Say goodbye to the days of enduring tooth pain during dental treatments.


dental exam

Common Dental Procedures Requiring Numbing

If you’re headed into a dental procedure and aren’t sure if numbing will be involved, here are some common examples where local anesthesia is used:

1. Fillings Services

Treating cavities involves removing decay, which can be sensitive without numbing. Your dentist will numb the area before getting started so you won’t feel a thing.

2. Crowns & Bridges

When capping a damaged tooth, numbing is often used during the process of reshaping the existing tooth and fitting the new crown.

3. Root Canals

A root canal gets rid of infected tissue in the tooth’s nerve chamber. Sounds intimidating, but with local anesthesia, you’ll feel surprisingly comfortable.

4. Tooth Extractions

The idea of pulling a tooth might seem scary, but strong numbing agents ensure you won’t feel any pain, just some pressure.

5. Gum Treatments

For gum disease treatments, numbing keeps sensitive gum tissue from becoming irritated during the procedure.

Each of these procedures might sound complex or uncomfortable, but rest assured Lane & Associates prioritizes painless dentistry. We’ll walk you through what to expect during your visit so there are no surprises.


Procedures That May Not Require Numbing

Not every dental procedure requires local anesthesia. Here are some treatments where you’re likely to stay numb-free:

  • Teeth Cleanings: Unless there’s significant tartar buildup causing sensitivity, cleanings are often harmless and pain-free.
  • X-rays: A snap of your teeth here, an image there, and you’re good to go. No numbing necessary.
  • Teeth Whitening: Whether you’re working toward sparkling white teeth in-office or at home, whitening typically causes only mild sensitivity.

If you’re someone who gets nervous even about smaller procedures, Lane & Associates offers ways to help you feel more at ease—from answering all your questions to using optional numbing aids during cleanings if needed.


dental cleaning

Common Myths About Dental Numbing

Myth 1: Getting Numb Hurts

Many people assume the needle’s sting will be unbearable, but that’s usually not the case. Dentists use topical numbing gel on your gums before injecting, so all you feel is a small pinch.

Myth 2: Numbing Doesn’t Work for Everyone

Modern anesthetics are incredibly effective. If you feel like it’s not kicking in, your dentist can adjust the dosage or try another technique to improve your comfort.

Myth 3: The Feeling Takes Forever to Wear Off

While it may feel like you’ll be numb forever, the sensation wears off faster than you think. And if necessary, there are steps you can take to help speed things along.

Don’t believe the rumors; ask your dentist about any concerns and get the facts straight!


How to Reduce Numbing Side Effects

If you’re eager to get rid of the numbness and return to normal, here are a few practical tips:

  1. Stay Hydrated: Drinking water can help flush the anesthetic out of your system faster.
  2. Use Warm Compresses: Once your dentist gives you the green light, gently applying warmth outside your cheek can stimulate blood flow.
  3. Engage in Light Activity: Walking or mild movement boosts circulation, which can help speed things up.
  4. Avoid Alcohol: It’s best to stay clear of alcohol while your body processes the anesthesia.

And remember to avoid chewing! It’s easy to accidentally bite your cheek, lip, or tongue when you can’t feel what’s happening. Soft, non-chewy foods are your best bet until full sensation is back.


Why Lane & Associates is Your Go-To for Comfortable Dental Care

At Lane & Associates Family Dentistry, we make your comfort our mission. We’ve spent over 40 years perfecting our patient-first approach, from using the latest dental technologies to creating a welcoming atmosphere.

Here’s Why Patients Trust Us:

  • Wide Range of Services: From general care to more specialized treatments, we’ve got everything your smile needs under one roof.
  • Customized Comfort Options: Anxious about your visit? We offer sedation options for a truly stress-free experience.
  • Convenient Locations: With offices throughout North Carolina, Lane & Associates makes visiting your dentist easier than ever.

Your smiles are our passion, and we want to help you feel confident every step of the way.

Don’t Wait to Put Your Smile First

Whether it’s preventive care or more advanced procedures, Lane & Associates is ready to help. Visit Lane & Associates today to schedule your appointment and experience dental care tailored just for you.


Final Thoughts

Numbing at the dentist doesn’t have to be confusing or intimidating. When you understand what’s happening and why, it’s easier to feel relaxed knowing you’re in experienced hands. At Lane & Associates, we’re here to make every visit smooth and comfortable with expert care that puts you first.

Take the next step for your oral health today. Schedule an appointment with us and discover why so many families trust Lane & Associates for their dental needs. We can’t wait to see you smile!


Share this post:

Who doesn’t love a bright, confident smile? Teeth whitening strips have become a go-to solution for many people looking to enhance their smiles in an easy and affordable way. But before you tear open that box of whitening strips, it’s important to know how to use them properly to avoid mistakes and get the best possible results.

Here’s everything you need to know about whitening strips—from how to apply them to tips for maximizing their effectiveness. By the end of this blog, you’ll feel confident and ready to brighten your smile while keeping your teeth healthy.

What Are Whitening Strips and How Do They Work?

Whitening strips are thin, flexible strips coated with a gel that contains peroxide, the active ingredient that whitens your teeth. Peroxide works by breaking down stains on the enamel, the outer layer of your teeth, to reveal a whiter, brighter surface. These strips are designed to conform to the shape of your teeth, making them effective and relatively easy to use.

The best part? You don’t need a dentist’s appointment or complicated tools to get professional-looking results. Whitening strips are a convenient, over-the-counter option for at-home whitening, perfect for people with busy schedules or tight budgets.

That said, using them incorrectly can lead to uneven whitening or even tooth sensitivity. That’s why understanding the process is crucial!

Woman smiling with bright white teeth next to shades of tooth colors at the dental office

Step-by-Step Guide on How to Use Whitening Strips

1. Start with Clean, Dry Teeth

Before applying whitening strips, it’s essential that your teeth are clean and dry. Brush and floss your teeth to remove particles that might block the gel from working effectively. Then, gently dry your teeth using a soft cloth or a tissue. Moisture can make the strips less adhesive and reduce their effectiveness, so don’t skip this step.

2. Peel and Align the Strips

Carefully peel the whitening strip off its backing, exposing the gel side. Align the strip with your teeth, making sure it covers all surfaces you want to whiten. Press it down firmly to ensure full contact with your teeth and smooth out any bubbles or folds.

Want the best results? Work carefully to avoid overlapping strips or leaving gaps between teeth.

3. Wait the Recommended Time

Every brand has its own timing recommendations, typically between 30 minutes to an hour. It’s tempting to leave the strips on for longer, but resist the urge! Overusing whitening products can increase sensitivity and won’t necessarily give you brighter teeth.

4. Remove the Strips and Rinse

When the time is up, gently peel off the strips and dispose of them. Rinse your mouth thoroughly to remove any leftover whitening gel. Avoid brushing your teeth immediately after use to minimize irritation, especially if your teeth feel sensitive.

5. Repeat as Directed

Most whitening strip kits suggest daily use for 1 to 2 weeks. Following the full treatment plan is key to achieving and maintaining noticeable results.

Dos and Don’ts of Using Whitening Strips

Now that you know the basic process, here are some additional tips to help you avoid common mistakes and maximize your results.

Do:

  • Follow the Instructions: Always read and follow the manufacturer’s guidelines for application time and duration of use.
  • Store Strips Properly: Keep them in a cool, dry place to ensure the gel stays effective.
  • Maintain Consistency: Use the strips daily for the recommended treatment period to see lasting results.
  • Pair with Good Oral Hygiene: Brushing and flossing are essential for maintaining your white smile after treatment.
  • Pay Attention to Timing: Choosing to use strips at night can help keep your teeth free from foods or drinks that might re-stain them during the day.

Don’t:

  • Brush Too Hard Before Application: Aggressive brushing can wear away enamel and increase sensitivity. Use a gentle hand and a soft-bristled toothbrush.
  • Use More Strips Than Recommended: Doubling up or using strips back-to-back won’t speed up the whitening process and can harm your teeth and gums.
  • Consume Stains During Treatment: While whitening strips work, steer clear of coffee, tea, red wine, and tobacco, which can counteract their effects.
  • Skip Consulting Your Dentist: If you’re unsure whether whitening strips are safe for you, consult your dentist for advice, especially if you have dental work like crowns or fillings.


Closeup of Teeth Whitening

What to Expect While Using Whitening Strips

Can Whitening Strips Cause Sensitivity?

It’s not uncommon to experience mild tooth sensitivity or gum irritation during whitening treatments. This usually subsides quickly after you finish your treatment. To minimize discomfort, use toothpaste designed for sensitive teeth and follow the instructions carefully.

How Long Does It Take to See Results?

Some people notice a difference after just a few applications, while others need to complete the full course to see results. Factors like the severity of stains and your natural tooth color can affect how quickly you notice a change.

How Long Do Results Last?

The longevity of your whitening results depends on your lifestyle. You can expect whiter teeth for around 6 months to a year, but avoiding staining foods and beverages can help extend your results. Regular touch-ups can also keep your smile bright.

Alternatives and Enhancements to Whitening Strips

While whitening strips are a fantastic option, they’re not the only tool in the whitening toolbox. Depending on your needs, one of the following options might also be worth exploring:

  • Professional Whitening Treatments: Available through your dentist for quicker, more dramatic results.
  • Whitening Toothpaste: Great for maintenance but unlikely to remove deep stains.
  • Custom Whitening Trays: These offer a more personalized fit and are available through your dentist.
  • At-Home Laser Kits: A pricier option but can provide quicker results when used with whitening gels.


Before and After Teeth Whitening Photo

Final Thoughts

Whitening strips are an accessible and effective way to brighten your smile as long as you use them correctly and follow proper precautions. By keeping your teeth clean, adhering to instructions, and avoiding common mistakes, you can achieve professional-level whitening from the comfort of your home.

Remember, whitening is just one part of oral care. Maintaining overall dental health through regular brushing, flossing, and dental check-ups is crucial for preserving your sparkling smile.

If you have any questions or concerns about whitening strips or maintaining your oral health, don’t hesitate to reach out to Lane and Associates Family Dentistry. Our team of dental professionals is here to help you achieve and maintain a smile you’re proud of!

Smile confidently and brightly—with just a bit of effort and care, a radiant smile is within your reach.

Share this post:

Closeup of Teeth Whitening

Gum recession is a common concern for many people and can be alarming when it starts to happen. It may make your teeth appear longer, create sensitivity, or even put your dental health at risk if left unaddressed. If you’ve noticed your gums receding, you might wonder, “Can gums grow back after receding?”

The short answer is no, gums do not naturally grow back once they have receded. However, there are effective steps you can take to prevent further recession and treatments to restore your gum health. By understanding the causes, prevention, and solutions for gum recession, you can better care for your smile and avoid future issues.

What Causes Gum Recession?

Receding gums don’t happen overnight. There are various factors that can lead to this condition, including lifestyle habits and oral health issues. Identifying the cause is often crucial for finding the right solution.

Common Causes of Gum Recession

  1. Gum Disease: One of the most common causes of gum recession is periodontal (gum) disease. This bacterial infection damages the gums and supporting structures, gradually causing them to pull away from the teeth.
  2. Aggressive Brushing: Brushing too hard or using a toothbrush with stiff bristles can wear away your enamel and irritate your gums, leading to recession over time.
  3. Teeth Grinding or Clenching: These habits can put excessive pressure on your teeth, causing the gums to recede.
  4. Smoking or Tobacco Use: Tobacco products increase the risk of gum disease and impair your gums’ ability to heal properly.
  5. Hormonal Changes: Shifts in hormones, such as during pregnancy or menopause, can make gums more sensitive and vulnerable to recession.
  6. Poor Oral Hygiene: Not brushing and flossing regularly allows plaque and tartar to build up, which can eventually cause gum recession.
  7. Genetics: Some people are simply more prone to gum issues due to their genetic makeup.

Understanding the root cause of your gum recession is the first step toward effective treatment and prevention.

dental exam

Can Gum Recession Be Reversed?

While receded gums cannot regenerate on their own, there are treatments and strategies that can help protect your teeth, stop further damage, and even restore some of the lost gum tissue.

Non-Surgical Options

  1. Improving Oral Hygiene: Committing to brushing twice a day with a soft-bristled toothbrush and flossing daily ensures you remove plaque and prevent further gum issues. Pair your routine with a water flosser for a thorough cleanup along the gumline.
  2. Regular Dental Cleanings: Seeing your dentist for professional cleanings every six months is crucial. These visits remove tartar buildup, which you can’t reach with regular brushing and flossing.
  3. Desensitizing Toothpaste: If sensitivity is an issue, using a toothpaste designed for sensitive teeth can help protect exposed roots and reduce discomfort.
  4. Orthodontic Adjustments: If misaligned teeth or bite issues are causing undue stress on your gums, orthodontic treatment may help alleviate the problem.


Preventing Gum Recession

Prevention is always better than cure, and protecting your gums from recession starts with good oral hygiene and healthy habits.

Daily Practices for Healthy Gums

  1. Brush Gently Twice a Day: Use a soft-bristled toothbrush and fluoridated toothpaste, and focus on cleaning the gumline without using too much force. Proper brushing technique makes all the difference.
  2. Floss Every Day: Flossing removes plaque and food particles from between your teeth and along the gumline, where a toothbrush can’t reach.
  3. Use a Water Flosser: Water flossers are excellent for gently flushing out debris and bacteria from hard-to-reach areas, especially if you have sensitive gums or dental work like braces.
  4. Rinse with an Antibacterial Mouthwash: Incorporating mouthwash into your daily routine can help reduce plaque and fight bacteria that cause gum disease.

Avoiding Sugary Snacks

Frequent snacking on sugary treats without brushing afterward can contribute to plaque buildup, leading to gum problems. If you’re craving something sweet, try to eat it alongside a meal, when saliva production is higher and better for rinsing away sugars. And if you can’t brush your teeth right away, rinse your mouth with water to minimize the effects of sugar on your teeth and gums.

Regular Dental Visits

Scheduling checkups and professional cleanings every six months allows your dentist to catch early signs of gum problems and provide preventative care. These appointments are also an opportunity to discuss any concerns or ask about effective dental tools and techniques.

Lifestyle Habits to Avoid

  1. Stop Smoking: Tobacco use is one of the leading causes of gum disease, so quitting can significantly improve your oral health.
  2. Avoid Stress-Induced Teeth Grinding: Use a night guard if you grind your teeth in your sleep, as this habit puts unnecessary pressure on your gums.


cropped view of smiling woman holding tooth model isolated on white

Why Treatment Matters

Ignoring gum recession can lead to serious complications, including tooth loss, bone loss, and increased sensitivity. Receding gums can also leave your teeth more vulnerable to decay. Early action can prevent these issues and help you maintain a healthier smile.

Final Thoughts

While gums don’t grow back naturally after receding, there are many effective ways to restore and protect your oral health. By adopting a consistent oral hygiene routine, including brushing twice daily, flossing daily, using a water flosser, and visiting your dentist every six months, you can prevent further recession and keep your gums healthy.

If you’re concerned about gum recession or want to learn about advanced treatment options, don’t hesitate to contact Lane and Associates Family Dentistry. Our compassionate team of dental professionals is here to assess your needs and provide personalized solutions.

A healthier, brighter smile is within reach—with the right care and support, you can protect your gums and enjoy long-lasting dental health!

Share this post:

Water flossers have become a popular tool for improving oral hygiene. By using a pressurized stream of water, these devices clean between teeth and along the gum line. While they are often praised as an effective alternative to traditional floss, some may wonder if water flossers can damage their gums. The truth is, improper use can lead to potential issues, but with the right techniques and settings, water flossers are safe and beneficial for most people.

Here, we’ll explore the benefits of water flossing, how to use these devices properly, and tips for keeping both your gums and flossers in top shape.


How Do Water Flossers Work?

water flosser


A water flosser, also known as an oral irrigator, uses a steady stream of water to dislodge food particles and plaque from hard-to-reach areas. These devices are gentle on the gums yet highly effective at keeping them clean. Most water flossers offer adjustable pressure settings, allowing users to find the intensity that suits their comfort level.

When used as part of a daily oral hygiene routine, water flossers promote healthier gums and a cleaner mouth.

Benefits of Using a Water Flosser

Water flossers offer several advantages over traditional floss, including:

  1. Improved Gum Health: Water flossers reduce plaque and help prevent gum disease.
  2. Ease of Use: They are a convenient option for those with braces, implants, or limited dexterity.
  3. Gentle Yet Effective: Unlike traditional floss, which can sometimes injure sensitive gums, water flossers offer a less abrasive option.

If used correctly, water flossers can be a game-changer for oral hygiene.

Can a Water Flosser Harm Your Gums?

The notion that a water flosser may harm gums is generally linked to improper use. For instance, using high-pressure settings indiscriminately can damage delicate gum tissue, particularly if the gums are already sensitive or prone to bleeding. Additionally, water flossers should complement—not replace—regular brushing and professional cleanings.

water flosser in use

Tips to Avoid Gum Damage

  • Adjust the Pressure: Start with the lowest setting and increase gradually as needed.
  • Follow Proper Technique: Hold the tip at a 45-degree angle to the gums and move slowly along the gum line.
  • Limit Usage: Use the water flosser once or twice daily for two minutes to avoid overuse.

By following these steps, you can reduce the risk of gum irritation while getting the full benefits of water flossing.

Should You Use a Water Flosser Every Day?

Using a water flosser daily is generally safe and effective for most people, and it can significantly improve oral hygiene. Daily use helps remove food particles that accumulate over the course of the day, keeping your gums clean and healthy. Learn more about how daily water flossing supports your oral health.

However, if you have sensitive gums, consult your dentist for personalized recommendations. Some patients might benefit from less frequent use or lower pressure settings.

Sharing a Water Flosser: Is It Safe?

While it might sound convenient, sharing a water flosser isn’t always advisable. Sharing can expose users to the risk of cross-contamination, spreading bacteria, or even infection. If sharing must occur, follow these hygiene tips:

  1. Use Interchangeable Tips: Many water flossers come with multiple color-coded tips for easy distinction.
  2. Clean After Each Use: Thoroughly wash and air-dry the reservoir and tips after every use.
  3. Replace Tips Regularly: Over time, tips can wear out or harbor bacteria, so replacing them every few months is essential.

For more detailed guidance on this subject, visit Lane & Associates’ guide on water flosser sharing safety.

Maintenance Tips for Your Water Flosser

A well-maintained water flosser ensures optimal performance and hygiene. Here are some essential maintenance practices:

  • Clean Regularly: Rinse the reservoir after every use and deep clean the device with warm, soapy water once a week.
  • Use Filtered Water: This can minimize mineral buildup and enhance the device’s longevity.
  • Inspect the Device: Check for signs of wear and replace tips or parts as needed.

Following these maintenance tips will help keep your water flosser hygienic and effective.

dental exam
Close-up of dental examination in an ambulance.

The Importance of Comprehensive Dental Exams

While water flossing is a helpful part of at-home oral care, it’s no substitute for professional dental checkups. Regular cleanings and exams allow dentists to catch issues like gum disease or tooth decay early on. Lane & Associates Family Dentistry offers comprehensive dental exams that complement your daily oral hygiene routine. These exams include X-rays, personalized treatment plans, and professional cleanings to ensure your oral health is always at its best.


Should You Ask Your Dentist About Water Flossing?

If you’re considering adding a water flosser to your routine or unsure about proper usage, consulting your dentist is always a smart move. A professional can provide tailored advice based on your specific dental health needs.

Final Thoughts

Water flossers are an excellent addition to any oral hygiene routine when used correctly. They offer a gentle, effective way to clean your gums and teeth, reducing the risk of gum disease and other dental issues. By understanding how to safely use and maintain these devices, you can enjoy all their benefits without worry.

If you have questions or want professional guidance on your oral health, contact Lane & Associates Family Dentistry today. Their experienced team is ready to help you achieve and maintain a sparkling, healthy smile!

Share this post:

Happy Holidays, From Our Family To Yours!

Our offices will be closed from December 24th through December 29th to celebrate the holidays. We’ll be back and ready to assist you on Monday, December 30th.

We wish you a joyous holiday season and a Happy New Year!