A healthy smile is more than just an aesthetic goal; it’s a crucial part of your overall well-being. However, one of the most common oral health challenges many people face is tartar buildup. Also known as calculus, tartar can lead to gum disease, cavities, and other dental problems if not addressed.

With the growing popularity of water flossers, many wonder if these handy devices can remove tartar. Short answer? Not exactly—but they’re still an important part of your oral care arsenal. Read on to learn everything about tartar, water flossers, and how you can maintain a pristine smile.

dental cleaning

What Is Tartar and Why Is It a Problem?

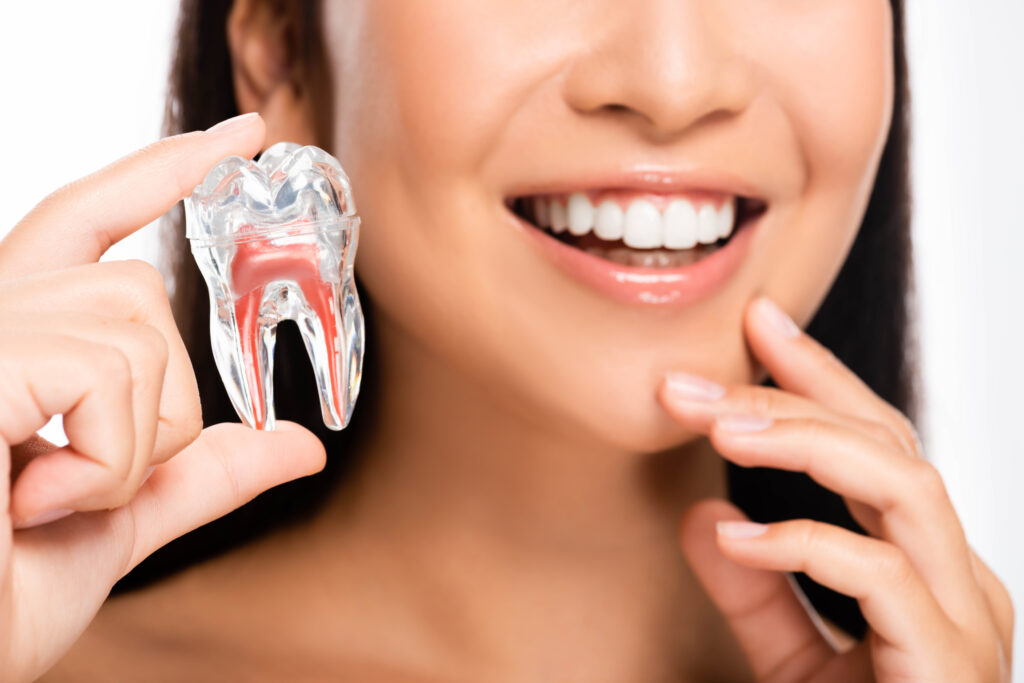
Tartar is a hardened form of dental plaque that clings stubbornly to your teeth and gumline. It develops when plaque, a sticky film of bacteria, combines with food particles and minerals in your saliva. If you don’t remove plaque promptly through proper brushing and flossing, it calcifies into tartar.

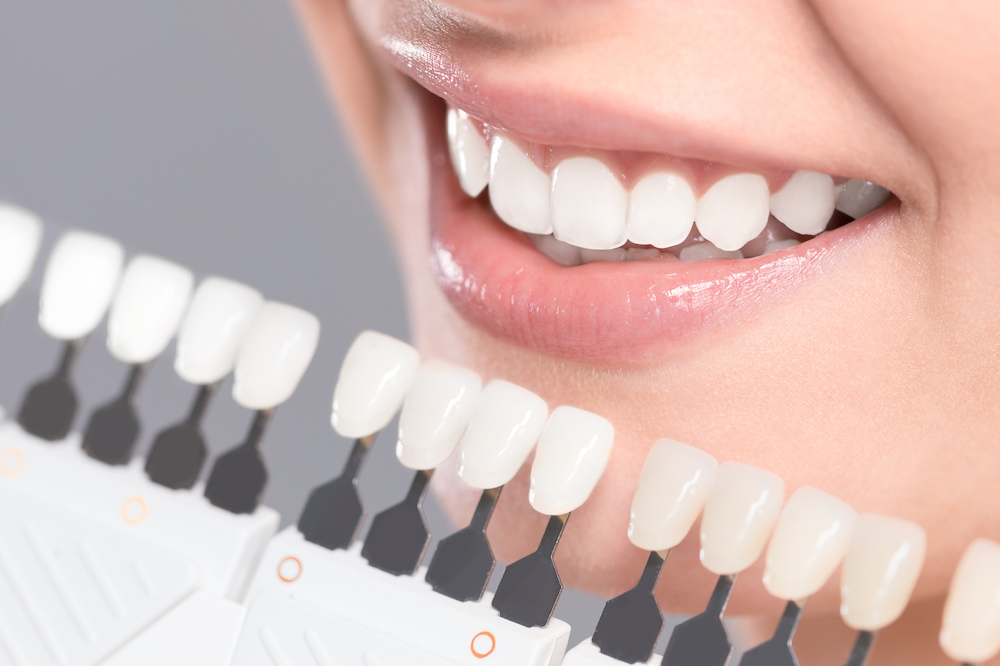
Why is this a big deal? Tartar isn’t just unsightly; it can wreak havoc on your oral health. Beyond the yellowish or brownish look it gives your teeth, tartar creates a rough surface that attracts more plaque and bacteria. This can irritate your gums, leading to gum disease, bad breath, and even tooth loss in severe cases.

The tough nature of tartar means you can’t brush or floss it away once it forms. Removing it requires the tools and expertise of a professional dentist.

The Science Behind Tartar Formation

Understanding how tartar forms helps illustrate why prevention is so critical. The process starts with plaque, which is made up of bacteria constantly forming on your teeth. The bacteria feed on sugars and starches from food, producing acids that can harm enamel and irritate gums.

If plaque isn’t removed within 24–72 hours, it hardens into tartar due to the presence of minerals in your saliva. Once tartar forms, it adheres tightly to your teeth and gumline, making it impossible to remove with at-home tools.

Tartar can form in hard-to-reach areas, like the back of your teeth or between them, which emphasizes the importance of thorough oral hygiene.

water flosser in use

Do Water Flossers Remove Tartar?

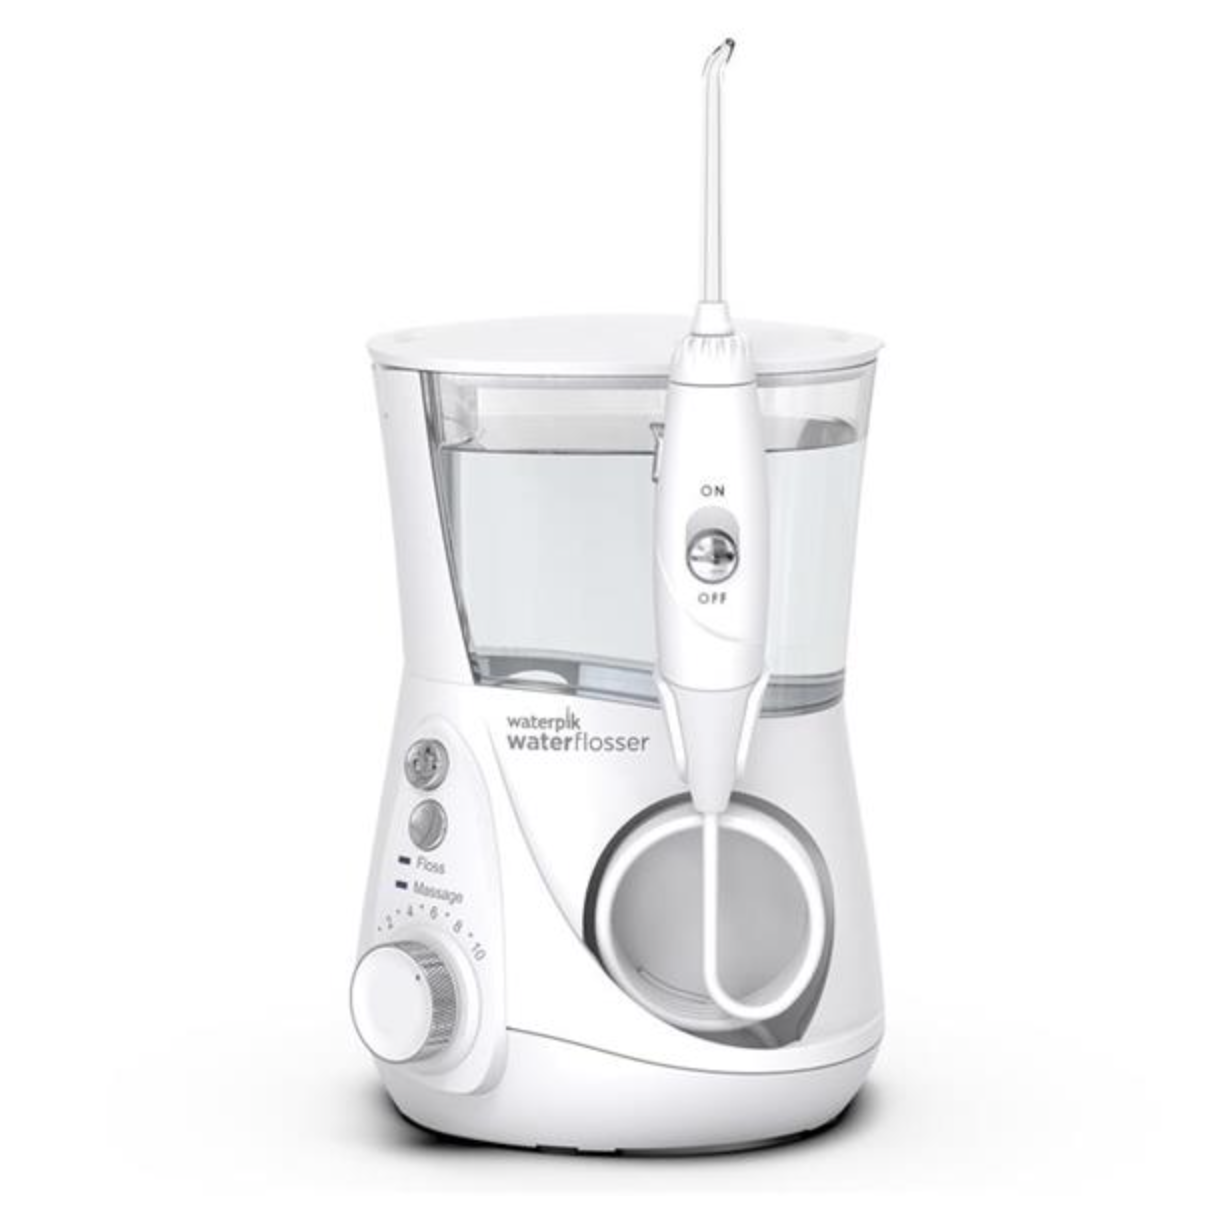
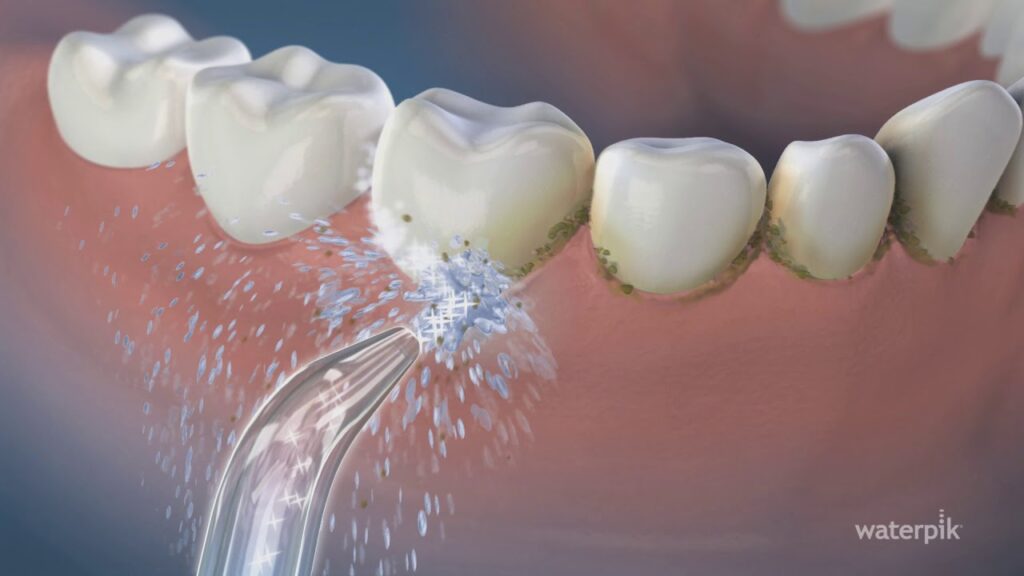
Water flossers, like the popular Waterpik, are often marketed as a user-friendly alternative to traditional flossing. They use a pressurized stream of water to clean between your teeth and along your gumline. While water flossers are effective at dislodging food particles and softening plaque, they cannot remove tartar.

Tartar is essentially hardened plaque that’s bonded to your tooth surface. No matter how strong the water stream, once plaque becomes tartar, it’s there to stay until removed professionally.

Here’s the good news: Water flossers can help prevent tartar by reducing the plaque that leads to it. When used consistently and correctly, they can be an excellent addition to your daily oral care routine.

The Unique Benefits of Water Flossers

While they can’t eliminate tartar, water flossers offer plenty of benefits that make them worth including in your routine. Here’s how they stand out:

1. Gentle on Sensitive Teeth and Gums

If you have sensitive teeth, receding gums, or existing gum disease, traditional flossing may feel uncomfortable. Water flossers provide a gentler way to clean without causing irritation.

2. Effective for Braces and Dental Work

Traditional flossing can be a challenge if you have braces, bridges, or dental implants. Water flossers make it easier to clean around brackets, wires, and other tricky areas, helping you maintain good hygiene.

3. Prevents Plaque Accumulation

By rinsing away food particles and soft plaque, water flossers reduce the risk of plaque hardening into tartar. They’re particularly helpful for cleaning along the gumline, where plaque often starts to accumulate.

4. Improves Gum Health

Some studies show that water flossers are as effective as traditional floss in reducing gum inflammation and bleeding. The pulsing water stream can massage the gums, improving blood circulation and overall gum health.

waterpik vs flossing

How to Use a Water Flosser for Best Results

To get the most out of your water flosser, follow these simple steps:

  1. Fill the Reservoir
    Add lukewarm water to the device’s reservoir. For added benefits, you can mix in a mouthwash approved by your dentist.
  2. Adjust the Pressure
    Start on a low setting and gradually increase the pressure as you get used to the feeling. If you have sensitive gums, stick with gentle pressure.
  3. Aim Carefully
    Lean over the sink to avoid splashing, hold the flosser perpendicular to your gumline, and trace each tooth. Spend extra time on hard-to-reach areas.
  4. Clean Consistently
    Use your water flosser once a day, preferably before bedtime, to remove debris from the day.

Remember, while water flossers are a handy tool, they should complement—not replace—brushing and traditional flossing.

Preventing Tartar Formation at Home

The best way to combat tartar is to stop it in its tracks. Here’s your game plan for keeping your teeth and gums healthy and tartar-free:

  • Brush Thoroughly
    Use a soft-bristled toothbrush and fluoride toothpaste. Brush at least twice a day for two minutes, focusing on all tooth surfaces and the gumline.
  • Floss Regularly
    Whether you choose string floss, picks, or a water flosser, cleaning between your teeth removes plaque from areas your toothbrush can’t reach.
  • Rinse Effectively
    Use an antiseptic or fluoride mouthwash to help eliminate bacteria and strengthen enamel.
  • Mind Your Diet
    Reduce sugary and starchy foods that feed bacteria. Include crunchy fruits and veggies like apples and carrots, which can help scrub plaque naturally.
  • Don’t Skip Dental Appointments
    Regular professional cleanings are crucial for removing tartar and spotting dental issues early.

Dentist cleaning teeth

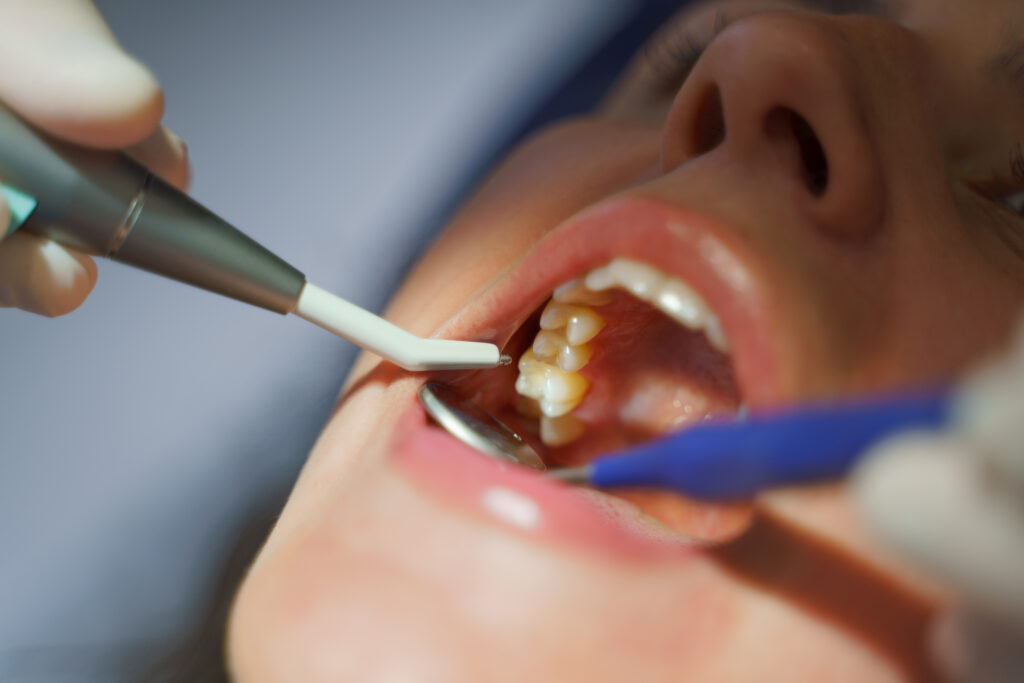
Why Professional Cleanings Are Non-Negotiable

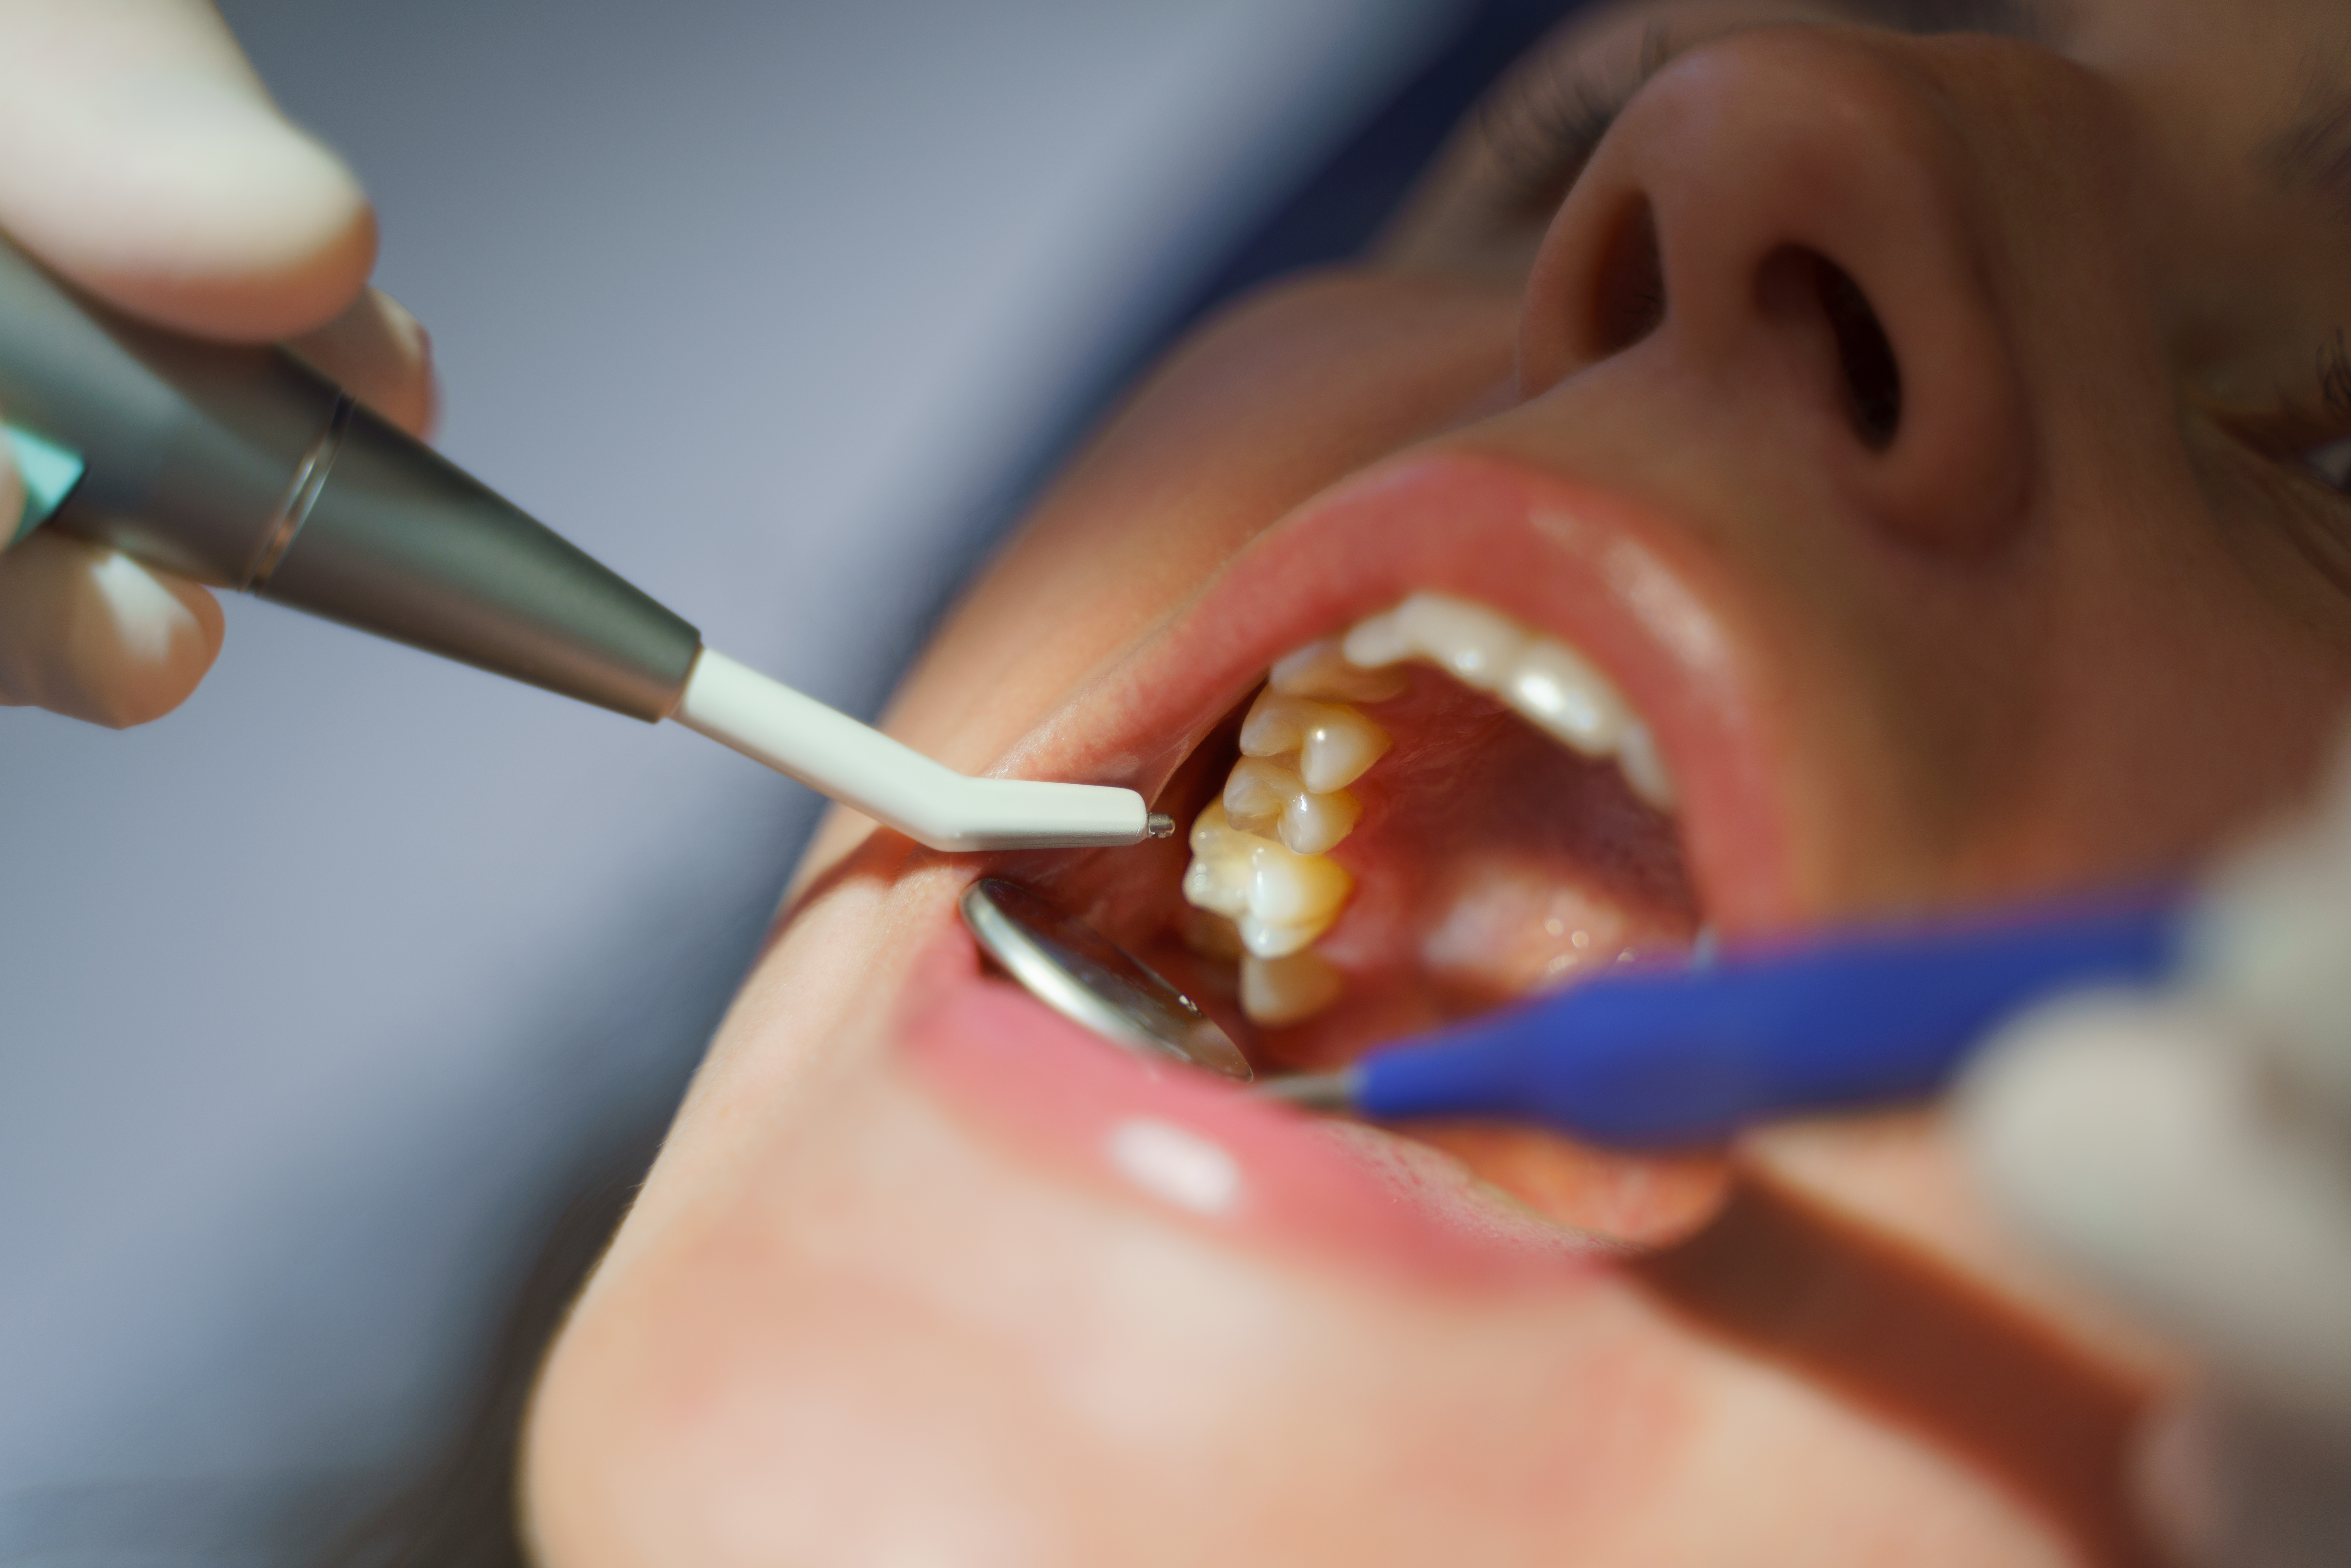
Once tartar forms, the only way to remove it is through a professional cleaning. During the procedure, a skilled dentist or hygienist will use special tools to carefully scrape away tartar from above and below your gumline.

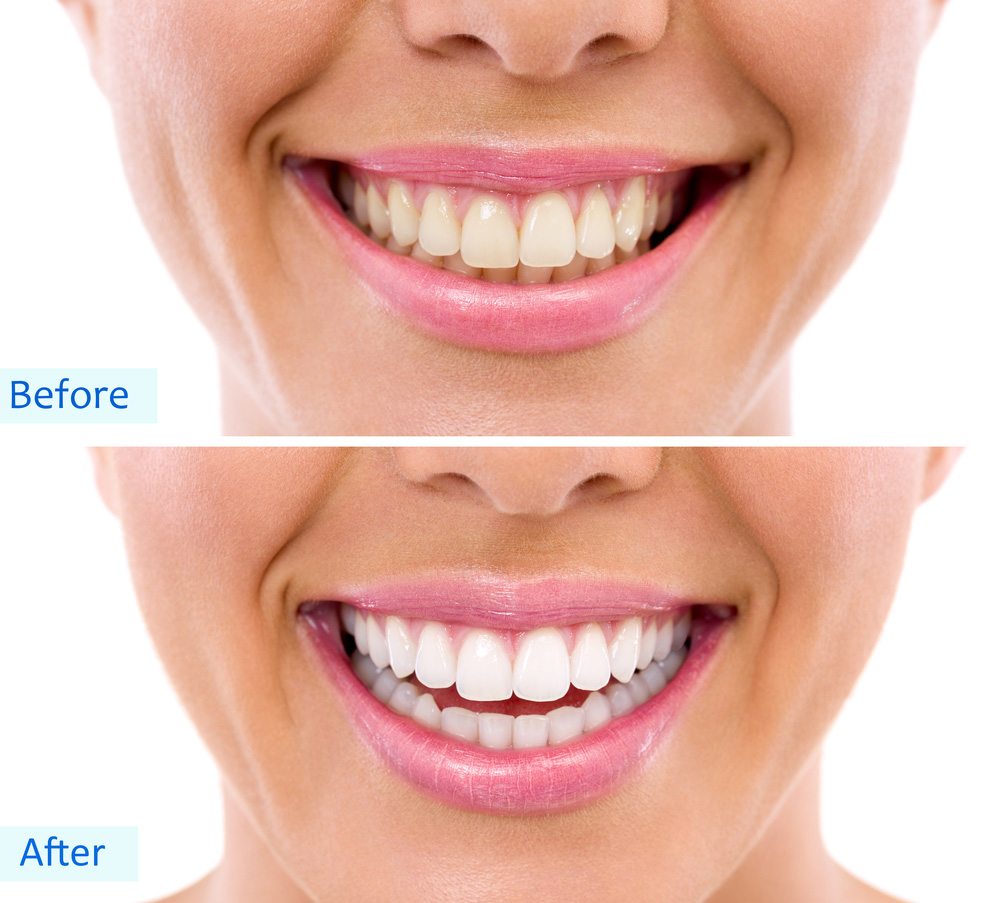
Professional cleanings not only prevent gum disease and cavities but also give your teeth a smoother surface, making it harder for plaque to stick moving forward.

Experience Top-Notch Care at Lane and Associates

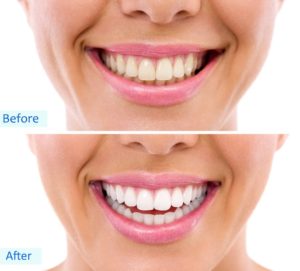
If you’ve noticed signs of tartar buildup, such as discoloration, rough spots, or bleeding gums, it’s time to book a dental appointment. At Lane and Associates Family Dentistry, we specialize in keeping smiles healthy and happy. With over 40 years of experience, our team offers gentle, personalized care for everything from routine cleanings to advanced treatments.

We use the latest techniques to remove tartar effectively and make recommendations to improve your routine at home. With multiple locations across North Carolina, excellent dental care has never been more convenient.

Take Charge of Your Oral Health

While water flossers can’t remove tartar, they shine as a tool for preventing it. Combined with good brushing habits, regular flossing, and professional cleanings, they help pave the way for a lifetime of healthy smiles.

Are you overdue for a dental cleaning? Contact Lane and Associates today to schedule your appointment. We’re here to give you the care and guidance you need to keep your teeth and gums in top shape!

Raleigh Wake Forest Rd Office Exterior WEB

Contact Lane and Associates Today For Tartar Removal

Schedule Your Visit

Call us at 1-877-LANE-DDS or visit our website to find the Lane and Associates location nearest you. Your brighter, healthier smile starts here! If you have noticed that plaque has begun to calcify on your teeth, contact Lane and Associates today to schedule a professional dental cleaning and tartar removal. Our experienced dentists will use the latest techniques and tools to remove any calculus buildup and help you maintain good oral health. We have offices located across North Carolina. Don’t wait, call us today!

Share this post:

If you’ve recently started using whitening strips or considering them, one question probably comes up a lot: Should you brush your teeth after using them? The short answer? It depends. But don’t worry—we’ll break it all down for you, so you get the best results from your whitening routine while keeping your smile healthy and bright.

We’ll also share a few extra tips for getting the most out of teeth whitening and maintaining good oral hygiene. And remember, if you want professional results or advice, a visit to Lane & Associates Family Dentistry is always a smart move!

Woman smiling with bright white teeth next to shades of tooth colors at the dental office


How Long Should You Wait To Brush Your Teeth After Whitening Strips?

Most dental experts recommend waiting 30 minutes before brushing your teeth after using whitening strips. Why, you ask? Whitening strips contain active ingredients like hydrogen peroxide or carbamide peroxide that penetrate the enamel to lift stains. Brushing too soon can disrupt this process and might even remove some of the whitening gel. Worse, scrubbing right after can irritate your teeth and gums, especially if you’ve got some sensitivity.

What If You Can’t Wait?

If you feel the need to clean your teeth after using strips, rinsing with water can be a good middle ground. A simple rinse can flush away any leftover gel without interfering with the whitening agents or causing irritation.

Brushing Before or After Whitening Strips?

Another common question is: Should you brush before or after using whitening strips? Here’s what we recommend:

Brushing Before

Brushing beforehand clears away plaque and debris, giving the whitening strips direct access to your enamel. This step makes the treatment more effective and helps ensure even results. Just make sure to wait a few minutes after brushing before applying the strips, as this gives your saliva time to naturally protect your teeth.

Brushing After

If you prefer brushing after whitening, remember to follow the 30-minute rule. Opt for a soft-bristled toothbrush and non-abrasive toothpaste to avoid irritation, especially if you’re prone to sensitivity.

Above all, always follow the directions provided on the packaging for your particular whitening strips. Some brands may have their own unique instructions.

Dental care

Morning or Night? When’s the Best Time To Use Whitening Strips?

Deciding between morning or night comes down to personal preference and your daily routine. Here are a few things to keep in mind:

  • Morning Users: If you like starting your day with a fresh, bright smile, morning is a great time. Just avoid eating or drinking anything (except water) immediately afterward to keep your teeth stain-free.
  • Night Owls: Using strips at night can be more convenient if you’re winding down and won’t be snacking or sipping coffee afterward. It gives the whitening agents more uninterrupted time to set.

There’s no universal “best” time; consistency is what truly matters for achieving a gleaming smile.

Tips for Safer Whitening at Home

Whitening strips are a popular at-home solution, but it’s essential to use them carefully. Here are some tips for a safe and effective whitening experience:

  1. Follow the Instructions: Read and stick to the guidelines on your specific product. Overusing whitening strips won’t speed up results and can actually harm your enamel.
  2. Manage Sensitivity: If you experience sensitivity while whitening, try skipping days between treatments or using a toothpaste designed for sensitive teeth.
  3. Protect Your Gums: Be careful not to overlap the strips onto your gums, as this can cause irritation or redness.
  4. Combine with Professional Advice: If you’re unsure whether whitening strips are right for you, consult a dentist. At Lane & Associates, our team can recommend products or treatments tailored to your needs.

Teeth Whitening Systems

Why Professional Whitening Could Be Your Best Bet

While whitening strips are convenient and budget-friendly, they might not deliver the same results as professional treatments. That’s where a dentist can come in handy! Lane & Associates offers professional whitening options that are both safe and highly effective. With treatments administered by dental experts, you can enjoy a dazzling smile with minimal sensitivity or irritation.

Professional cosmetic dentistry and whitening also allows us to target stubborn stains, discoloration caused by factors like coffee, wine, smoking and other imperfections. Plus, we can make recommendations on how to maintain your white smile long-term.

Maintain a Radiant Smile Year-Round

Whitening your teeth is just the first step. Keep your smile looking its best with these easy tips:

  • Maintain good oral hygiene and brush twice a day with a fluoride toothpaste.
  • Floss daily to remove plaque that toothbrushes can’t reach.
  • Limit stain-causing foods and beverages like coffee, tea, and red wine.
  • Visit your dentist regularly for cleanings and check-ups.

At Lane & Associates Family Dentistry, we’re here to help with all your dental needs—from routine care to advanced cosmetic treatments. If you’re ready to upgrade your smile, why not book a visit today?

Exterior Office

Schedule Your Appointment Today!

Taking care of your teeth is about more than just whitening. It’s about maintaining good oral health so your smile stays vibrant and healthy for years to come. Have questions or need professional whitening? Lane & Associates Family Dentistry has locations across North Carolina to serve you.

Book your appointment today and take the first step toward your best, brightest smile! Call 1-877-LANE-DDS or use our online contact form to find a location near you.

Your dazzling smile is just one visit away.

Share this post:

Going to the dentist can bring up all sorts of questions, especially when it comes to the feeling you’re left with after a procedure. That “rubber-face” sensation, the slurred speech, the unintentional biting of your cheek or tongue without even realizing it—we’ve all been there.

But what’s really happening when your dentist numbs your mouth, and how long will it take to feel normal again? This guide breaks it all down for you, whether you’re getting ready for treatment or just curious to learn more. Plus, we’ll share why Lane & Associates Family Dentistry is the perfect place to make your dental care stress-free and pleasant.


novocaine needle


How Long Will Numbing Last?

The short answer? Dental numbness typically lasts 1 to 3 hours, but it can sometimes stick around for 4 to 6 hours depending on a few factors. These include:

  • The type of anesthetic your dentist used
  • The location of the injection
  • Your age, weight, and overall health
  • How quickly your body metabolizes the anesthetic

For example, certain anesthetics, like those used during root canals or tooth extractions, are designed to last longer to get you through lengthier procedures.

However, if it feels like the numbness is wearing off too slowly or it persists beyond 24 hours, that’s your cue to call the dentist for a quick check-in.

At Lane & Associates, we assess every patient carefully and tailor the type and amount of anesthesia to fit your needs perfectly. Your comfort and safety always come first!

Does It Ever Go Away Faster?

Yes! Your body will naturally metabolize the anesthetic over time, but your recovery can sometimes be sped up. More on that in the post-procedure care tips below!


The Science Behind Local Anesthesia

Ever wonder how local anesthesia actually works? The secret lies in how it interacts with your nervous system. Before getting into the nitty-gritty, think about what normally happens when you feel pain. Your brain gets signals from your nerves—for example, “Ouch, I just banged my elbow.”

Local anesthesia temporarily blocks those signals from traveling to your brain. Essentially, it disrupts the communication between the affected nerves and your brain, keeping you pain-free while your dentist works.

Types of Local Anesthesia

There are two main kinds of local anesthetics used during dental visits:

  1. Topical Anesthesia
    This is applied directly to the surface of your gums, usually with a gel or spray, to numb the area before an injection. It minimizes the sting from the needle.
  2. Injectable Anesthesia
    This is the more common type for procedures like fillings or extractions. Injected directly near the nerve, it blocks sensations in the surrounding area until the procedure is complete.

Science aside, isn’t it amazing how far dentistry has come? Say goodbye to the days of enduring tooth pain during dental treatments.


dental exam

Common Dental Procedures Requiring Numbing

If you’re headed into a dental procedure and aren’t sure if numbing will be involved, here are some common examples where local anesthesia is used:

1. Fillings Services

Treating cavities involves removing decay, which can be sensitive without numbing. Your dentist will numb the area before getting started so you won’t feel a thing.

2. Crowns & Bridges

When capping a damaged tooth, numbing is often used during the process of reshaping the existing tooth and fitting the new crown.

3. Root Canals

A root canal gets rid of infected tissue in the tooth’s nerve chamber. Sounds intimidating, but with local anesthesia, you’ll feel surprisingly comfortable.

4. Tooth Extractions

The idea of pulling a tooth might seem scary, but strong numbing agents ensure you won’t feel any pain, just some pressure.

5. Gum Treatments

For gum disease treatments, numbing keeps sensitive gum tissue from becoming irritated during the procedure.

Each of these procedures might sound complex or uncomfortable, but rest assured Lane & Associates prioritizes painless dentistry. We’ll walk you through what to expect during your visit so there are no surprises.


Procedures That May Not Require Numbing

Not every dental procedure requires local anesthesia. Here are some treatments where you’re likely to stay numb-free:

  • Teeth Cleanings: Unless there’s significant tartar buildup causing sensitivity, cleanings are often harmless and pain-free.
  • X-rays: A snap of your teeth here, an image there, and you’re good to go. No numbing necessary.
  • Teeth Whitening: Whether you’re working toward sparkling white teeth in-office or at home, whitening typically causes only mild sensitivity.

If you’re someone who gets nervous even about smaller procedures, Lane & Associates offers ways to help you feel more at ease—from answering all your questions to using optional numbing aids during cleanings if needed.


dental cleaning

Common Myths About Dental Numbing

Myth 1: Getting Numb Hurts

Many people assume the needle’s sting will be unbearable, but that’s usually not the case. Dentists use topical numbing gel on your gums before injecting, so all you feel is a small pinch.

Myth 2: Numbing Doesn’t Work for Everyone

Modern anesthetics are incredibly effective. If you feel like it’s not kicking in, your dentist can adjust the dosage or try another technique to improve your comfort.

Myth 3: The Feeling Takes Forever to Wear Off

While it may feel like you’ll be numb forever, the sensation wears off faster than you think. And if necessary, there are steps you can take to help speed things along.

Don’t believe the rumors; ask your dentist about any concerns and get the facts straight!


How to Reduce Numbing Side Effects

If you’re eager to get rid of the numbness and return to normal, here are a few practical tips:

  1. Stay Hydrated: Drinking water can help flush the anesthetic out of your system faster.
  2. Use Warm Compresses: Once your dentist gives you the green light, gently applying warmth outside your cheek can stimulate blood flow.
  3. Engage in Light Activity: Walking or mild movement boosts circulation, which can help speed things up.
  4. Avoid Alcohol: It’s best to stay clear of alcohol while your body processes the anesthesia.

And remember to avoid chewing! It’s easy to accidentally bite your cheek, lip, or tongue when you can’t feel what’s happening. Soft, non-chewy foods are your best bet until full sensation is back.


Why Lane & Associates is Your Go-To for Comfortable Dental Care

At Lane & Associates Family Dentistry, we make your comfort our mission. We’ve spent over 40 years perfecting our patient-first approach, from using the latest dental technologies to creating a welcoming atmosphere.

Here’s Why Patients Trust Us:

  • Wide Range of Services: From general care to more specialized treatments, we’ve got everything your smile needs under one roof.
  • Customized Comfort Options: Anxious about your visit? We offer sedation options for a truly stress-free experience.
  • Convenient Locations: With offices throughout North Carolina, Lane & Associates makes visiting your dentist easier than ever.

Your smiles are our passion, and we want to help you feel confident every step of the way.

Don’t Wait to Put Your Smile First

Whether it’s preventive care or more advanced procedures, Lane & Associates is ready to help. Visit Lane & Associates today to schedule your appointment and experience dental care tailored just for you.


Final Thoughts

Numbing at the dentist doesn’t have to be confusing or intimidating. When you understand what’s happening and why, it’s easier to feel relaxed knowing you’re in experienced hands. At Lane & Associates, we’re here to make every visit smooth and comfortable with expert care that puts you first.

Take the next step for your oral health today. Schedule an appointment with us and discover why so many families trust Lane & Associates for their dental needs. We can’t wait to see you smile!


Share this post:

Who doesn’t love a bright, confident smile? Teeth whitening strips have become a go-to solution for many people looking to enhance their smiles in an easy and affordable way. But before you tear open that box of whitening strips, it’s important to know how to use them properly to avoid mistakes and get the best possible results.

Here’s everything you need to know about whitening strips—from how to apply them to tips for maximizing their effectiveness. By the end of this blog, you’ll feel confident and ready to brighten your smile while keeping your teeth healthy.

What Are Whitening Strips and How Do They Work?

Whitening strips are thin, flexible strips coated with a gel that contains peroxide, the active ingredient that whitens your teeth. Peroxide works by breaking down stains on the enamel, the outer layer of your teeth, to reveal a whiter, brighter surface. These strips are designed to conform to the shape of your teeth, making them effective and relatively easy to use.

The best part? You don’t need a dentist’s appointment or complicated tools to get professional-looking results. Whitening strips are a convenient, over-the-counter option for at-home whitening, perfect for people with busy schedules or tight budgets.

That said, using them incorrectly can lead to uneven whitening or even tooth sensitivity. That’s why understanding the process is crucial!

Woman smiling with bright white teeth next to shades of tooth colors at the dental office

Step-by-Step Guide on How to Use Whitening Strips

1. Start with Clean, Dry Teeth

Before applying whitening strips, it’s essential that your teeth are clean and dry. Brush and floss your teeth to remove particles that might block the gel from working effectively. Then, gently dry your teeth using a soft cloth or a tissue. Moisture can make the strips less adhesive and reduce their effectiveness, so don’t skip this step.

2. Peel and Align the Strips

Carefully peel the whitening strip off its backing, exposing the gel side. Align the strip with your teeth, making sure it covers all surfaces you want to whiten. Press it down firmly to ensure full contact with your teeth and smooth out any bubbles or folds.

Want the best results? Work carefully to avoid overlapping strips or leaving gaps between teeth.

3. Wait the Recommended Time

Every brand has its own timing recommendations, typically between 30 minutes to an hour. It’s tempting to leave the strips on for longer, but resist the urge! Overusing whitening products can increase sensitivity and won’t necessarily give you brighter teeth.

4. Remove the Strips and Rinse

When the time is up, gently peel off the strips and dispose of them. Rinse your mouth thoroughly to remove any leftover whitening gel. Avoid brushing your teeth immediately after use to minimize irritation, especially if your teeth feel sensitive.

5. Repeat as Directed

Most whitening strip kits suggest daily use for 1 to 2 weeks. Following the full treatment plan is key to achieving and maintaining noticeable results.

Dos and Don’ts of Using Whitening Strips

Now that you know the basic process, here are some additional tips to help you avoid common mistakes and maximize your results.

Do:

  • Follow the Instructions: Always read and follow the manufacturer’s guidelines for application time and duration of use.
  • Store Strips Properly: Keep them in a cool, dry place to ensure the gel stays effective.
  • Maintain Consistency: Use the strips daily for the recommended treatment period to see lasting results.
  • Pair with Good Oral Hygiene: Brushing and flossing are essential for maintaining your white smile after treatment.
  • Pay Attention to Timing: Choosing to use strips at night can help keep your teeth free from foods or drinks that might re-stain them during the day.

Don’t:

  • Brush Too Hard Before Application: Aggressive brushing can wear away enamel and increase sensitivity. Use a gentle hand and a soft-bristled toothbrush.
  • Use More Strips Than Recommended: Doubling up or using strips back-to-back won’t speed up the whitening process and can harm your teeth and gums.
  • Consume Stains During Treatment: While whitening strips work, steer clear of coffee, tea, red wine, and tobacco, which can counteract their effects.
  • Skip Consulting Your Dentist: If you’re unsure whether whitening strips are safe for you, consult your dentist for advice, especially if you have dental work like crowns or fillings.


Closeup of Teeth Whitening

What to Expect While Using Whitening Strips

Can Whitening Strips Cause Sensitivity?

It’s not uncommon to experience mild tooth sensitivity or gum irritation during whitening treatments. This usually subsides quickly after you finish your treatment. To minimize discomfort, use toothpaste designed for sensitive teeth and follow the instructions carefully.

How Long Does It Take to See Results?

Some people notice a difference after just a few applications, while others need to complete the full course to see results. Factors like the severity of stains and your natural tooth color can affect how quickly you notice a change.

How Long Do Results Last?

The longevity of your whitening results depends on your lifestyle. You can expect whiter teeth for around 6 months to a year, but avoiding staining foods and beverages can help extend your results. Regular touch-ups can also keep your smile bright.

Alternatives and Enhancements to Whitening Strips

While whitening strips are a fantastic option, they’re not the only tool in the whitening toolbox. Depending on your needs, one of the following options might also be worth exploring:

  • Professional Whitening Treatments: Available through your dentist for quicker, more dramatic results.
  • Whitening Toothpaste: Great for maintenance but unlikely to remove deep stains.
  • Custom Whitening Trays: These offer a more personalized fit and are available through your dentist.
  • At-Home Laser Kits: A pricier option but can provide quicker results when used with whitening gels.


Before and After Teeth Whitening Photo

Final Thoughts

Whitening strips are an accessible and effective way to brighten your smile as long as you use them correctly and follow proper precautions. By keeping your teeth clean, adhering to instructions, and avoiding common mistakes, you can achieve professional-level whitening from the comfort of your home.

Remember, whitening is just one part of oral care. Maintaining overall dental health through regular brushing, flossing, and dental check-ups is crucial for preserving your sparkling smile.

If you have any questions or concerns about whitening strips or maintaining your oral health, don’t hesitate to reach out to Lane and Associates Family Dentistry. Our team of dental professionals is here to help you achieve and maintain a smile you’re proud of!

Smile confidently and brightly—with just a bit of effort and care, a radiant smile is within your reach.

Share this post:

Closeup of Teeth Whitening

Gum recession is a common concern for many people and can be alarming when it starts to happen. It may make your teeth appear longer, create sensitivity, or even put your dental health at risk if left unaddressed. If you’ve noticed your gums receding, you might wonder, “Can gums grow back after receding?”

The short answer is no, gums do not naturally grow back once they have receded. However, there are effective steps you can take to prevent further recession and treatments to restore your gum health. By understanding the causes, prevention, and solutions for gum recession, you can better care for your smile and avoid future issues.

What Causes Gum Recession?

Receding gums don’t happen overnight. There are various factors that can lead to this condition, including lifestyle habits and oral health issues. Identifying the cause is often crucial for finding the right solution.

Common Causes of Gum Recession

  1. Gum Disease: One of the most common causes of gum recession is periodontal (gum) disease. This bacterial infection damages the gums and supporting structures, gradually causing them to pull away from the teeth.
  2. Aggressive Brushing: Brushing too hard or using a toothbrush with stiff bristles can wear away your enamel and irritate your gums, leading to recession over time.
  3. Teeth Grinding or Clenching: These habits can put excessive pressure on your teeth, causing the gums to recede.
  4. Smoking or Tobacco Use: Tobacco products increase the risk of gum disease and impair your gums’ ability to heal properly.
  5. Hormonal Changes: Shifts in hormones, such as during pregnancy or menopause, can make gums more sensitive and vulnerable to recession.
  6. Poor Oral Hygiene: Not brushing and flossing regularly allows plaque and tartar to build up, which can eventually cause gum recession.
  7. Genetics: Some people are simply more prone to gum issues due to their genetic makeup.

Understanding the root cause of your gum recession is the first step toward effective treatment and prevention.

dental exam

Can Gum Recession Be Reversed?

While receded gums cannot regenerate on their own, there are treatments and strategies that can help protect your teeth, stop further damage, and even restore some of the lost gum tissue.

Non-Surgical Options

  1. Improving Oral Hygiene: Committing to brushing twice a day with a soft-bristled toothbrush and flossing daily ensures you remove plaque and prevent further gum issues. Pair your routine with a water flosser for a thorough cleanup along the gumline.
  2. Regular Dental Cleanings: Seeing your dentist for professional cleanings every six months is crucial. These visits remove tartar buildup, which you can’t reach with regular brushing and flossing.
  3. Desensitizing Toothpaste: If sensitivity is an issue, using a toothpaste designed for sensitive teeth can help protect exposed roots and reduce discomfort.
  4. Orthodontic Adjustments: If misaligned teeth or bite issues are causing undue stress on your gums, orthodontic treatment may help alleviate the problem.


Preventing Gum Recession

Prevention is always better than cure, and protecting your gums from recession starts with good oral hygiene and healthy habits.

Daily Practices for Healthy Gums

  1. Brush Gently Twice a Day: Use a soft-bristled toothbrush and fluoridated toothpaste, and focus on cleaning the gumline without using too much force. Proper brushing technique makes all the difference.
  2. Floss Every Day: Flossing removes plaque and food particles from between your teeth and along the gumline, where a toothbrush can’t reach.
  3. Use a Water Flosser: Water flossers are excellent for gently flushing out debris and bacteria from hard-to-reach areas, especially if you have sensitive gums or dental work like braces.
  4. Rinse with an Antibacterial Mouthwash: Incorporating mouthwash into your daily routine can help reduce plaque and fight bacteria that cause gum disease.

Avoiding Sugary Snacks

Frequent snacking on sugary treats without brushing afterward can contribute to plaque buildup, leading to gum problems. If you’re craving something sweet, try to eat it alongside a meal, when saliva production is higher and better for rinsing away sugars. And if you can’t brush your teeth right away, rinse your mouth with water to minimize the effects of sugar on your teeth and gums.

Regular Dental Visits

Scheduling checkups and professional cleanings every six months allows your dentist to catch early signs of gum problems and provide preventative care. These appointments are also an opportunity to discuss any concerns or ask about effective dental tools and techniques.

Lifestyle Habits to Avoid

  1. Stop Smoking: Tobacco use is one of the leading causes of gum disease, so quitting can significantly improve your oral health.
  2. Avoid Stress-Induced Teeth Grinding: Use a night guard if you grind your teeth in your sleep, as this habit puts unnecessary pressure on your gums.


cropped view of smiling woman holding tooth model isolated on white

Why Treatment Matters

Ignoring gum recession can lead to serious complications, including tooth loss, bone loss, and increased sensitivity. Receding gums can also leave your teeth more vulnerable to decay. Early action can prevent these issues and help you maintain a healthier smile.

Final Thoughts

While gums don’t grow back naturally after receding, there are many effective ways to restore and protect your oral health. By adopting a consistent oral hygiene routine, including brushing twice daily, flossing daily, using a water flosser, and visiting your dentist every six months, you can prevent further recession and keep your gums healthy.

If you’re concerned about gum recession or want to learn about advanced treatment options, don’t hesitate to contact Lane and Associates Family Dentistry. Our compassionate team of dental professionals is here to assess your needs and provide personalized solutions.

A healthier, brighter smile is within reach—with the right care and support, you can protect your gums and enjoy long-lasting dental health!

Share this post:

Water flossers have become a popular tool for improving oral hygiene. By using a pressurized stream of water, these devices clean between teeth and along the gum line. While they are often praised as an effective alternative to traditional floss, some may wonder if water flossers can damage their gums. The truth is, improper use can lead to potential issues, but with the right techniques and settings, water flossers are safe and beneficial for most people.

Here, we’ll explore the benefits of water flossing, how to use these devices properly, and tips for keeping both your gums and flossers in top shape.


How Do Water Flossers Work?

water flosser


A water flosser, also known as an oral irrigator, uses a steady stream of water to dislodge food particles and plaque from hard-to-reach areas. These devices are gentle on the gums yet highly effective at keeping them clean. Most water flossers offer adjustable pressure settings, allowing users to find the intensity that suits their comfort level.

When used as part of a daily oral hygiene routine, water flossers promote healthier gums and a cleaner mouth.

Benefits of Using a Water Flosser

Water flossers offer several advantages over traditional floss, including:

  1. Improved Gum Health: Water flossers reduce plaque and help prevent gum disease.
  2. Ease of Use: They are a convenient option for those with braces, implants, or limited dexterity.
  3. Gentle Yet Effective: Unlike traditional floss, which can sometimes injure sensitive gums, water flossers offer a less abrasive option.

If used correctly, water flossers can be a game-changer for oral hygiene.

Can a Water Flosser Harm Your Gums?

The notion that a water flosser may harm gums is generally linked to improper use. For instance, using high-pressure settings indiscriminately can damage delicate gum tissue, particularly if the gums are already sensitive or prone to bleeding. Additionally, water flossers should complement—not replace—regular brushing and professional cleanings.

water flosser in use

Tips to Avoid Gum Damage

  • Adjust the Pressure: Start with the lowest setting and increase gradually as needed.
  • Follow Proper Technique: Hold the tip at a 45-degree angle to the gums and move slowly along the gum line.
  • Limit Usage: Use the water flosser once or twice daily for two minutes to avoid overuse.

By following these steps, you can reduce the risk of gum irritation while getting the full benefits of water flossing.

Should You Use a Water Flosser Every Day?

Using a water flosser daily is generally safe and effective for most people, and it can significantly improve oral hygiene. Daily use helps remove food particles that accumulate over the course of the day, keeping your gums clean and healthy. Learn more about how daily water flossing supports your oral health.

However, if you have sensitive gums, consult your dentist for personalized recommendations. Some patients might benefit from less frequent use or lower pressure settings.

Sharing a Water Flosser: Is It Safe?

While it might sound convenient, sharing a water flosser isn’t always advisable. Sharing can expose users to the risk of cross-contamination, spreading bacteria, or even infection. If sharing must occur, follow these hygiene tips:

  1. Use Interchangeable Tips: Many water flossers come with multiple color-coded tips for easy distinction.
  2. Clean After Each Use: Thoroughly wash and air-dry the reservoir and tips after every use.
  3. Replace Tips Regularly: Over time, tips can wear out or harbor bacteria, so replacing them every few months is essential.

For more detailed guidance on this subject, visit Lane & Associates’ guide on water flosser sharing safety.

Maintenance Tips for Your Water Flosser

A well-maintained water flosser ensures optimal performance and hygiene. Here are some essential maintenance practices:

  • Clean Regularly: Rinse the reservoir after every use and deep clean the device with warm, soapy water once a week.
  • Use Filtered Water: This can minimize mineral buildup and enhance the device’s longevity.
  • Inspect the Device: Check for signs of wear and replace tips or parts as needed.

Following these maintenance tips will help keep your water flosser hygienic and effective.

dental exam
Close-up of dental examination in an ambulance.

The Importance of Comprehensive Dental Exams

While water flossing is a helpful part of at-home oral care, it’s no substitute for professional dental checkups. Regular cleanings and exams allow dentists to catch issues like gum disease or tooth decay early on. Lane & Associates Family Dentistry offers comprehensive dental exams that complement your daily oral hygiene routine. These exams include X-rays, personalized treatment plans, and professional cleanings to ensure your oral health is always at its best.


Should You Ask Your Dentist About Water Flossing?

If you’re considering adding a water flosser to your routine or unsure about proper usage, consulting your dentist is always a smart move. A professional can provide tailored advice based on your specific dental health needs.

Final Thoughts

Water flossers are an excellent addition to any oral hygiene routine when used correctly. They offer a gentle, effective way to clean your gums and teeth, reducing the risk of gum disease and other dental issues. By understanding how to safely use and maintain these devices, you can enjoy all their benefits without worry.

If you have questions or want professional guidance on your oral health, contact Lane & Associates Family Dentistry today. Their experienced team is ready to help you achieve and maintain a sparkling, healthy smile!

Share this post:

If you’re thinking about getting veneers or already have them, you might wonder if they can get cavities. Veneers are a great way to improve the look of your smile, but they don’t make your teeth invincible. Let’s break down everything you need to know about cavities and veneers.

Can Veneers Get Cavities?

No, veneers themselves do not get cavities. They are made of porcelain or composite resin, materials that do not decay like natural teeth. However, the teeth underneath your veneers are still vulnerable to cavities if they are not properly cared for.

How Do You Know If You Have a Cavity Under a Veneer?

Since veneers cover the front surface of your teeth, spotting a cavity underneath them can be tricky. Here are some signs that may indicate a cavity under a veneer:

  • Tooth Sensitivity – If you feel pain or sensitivity when eating hot, cold, or sweet foods, there may be a cavity forming underneath.
  • Discoloration – A dark or yellowish stain around the edges of your veneer could mean decay underneath.
  • Pain or Discomfort – Persistent tooth pain could indicate a cavity forming behind the veneer.
  • Bad Breath – Decay can cause bacteria buildup, leading to bad breath that doesn’t go away with brushing.
  • Loose Veneer – If a veneer starts to feel loose or wobbly, a cavity may be damaging the underlying tooth structure.

If you notice any of these symptoms, visit your dentist as soon as possible.

What Happens If You Get a Cavity With Veneers?

If you develop a cavity in a tooth with a veneer, your dentist will need to treat it. The process may include:

  • Removing the Veneer – In some cases, the dentist will take off the veneer to access the decay underneath.
  • Filling the Cavity – The decayed part of the tooth is cleaned out and filled just like a regular cavity.
  • Placing a New Veneer – If the old veneer was removed, a new one may need to be placed.
  • Possible Crown Placement – If the decay is too severe, the tooth may require a dental crown instead of a veneer.

Ignoring a cavity under a veneer can lead to more serious dental issues, such as infections or even tooth loss.

Do Teeth Decay Under Veneers?

Yes, teeth can still decay under veneers if proper oral hygiene is not maintained. Here’s how decay can happen:

  • Plaque and Bacteria Build-Up – If food particles get trapped around the edges of the veneer, bacteria can cause decay.
  • Poor Oral Hygiene – Not brushing and flossing properly can allow cavities to form.
  • Gum Recession – If the gums recede, the exposed part of the tooth (not covered by the veneer) becomes vulnerable to decay.
  • Weak Bond Between Veneer and Tooth – If a veneer is not properly bonded, bacteria can sneak in and start breaking down the natural tooth.

How to Avoid Cavities Under Veneers

Good oral hygiene is key to preventing cavities under veneers. Here are some tips to keep your teeth and veneers in top shape:

  • Brush Twice a Day – Use fluoride toothpaste and brush for at least two minutes.
  • Floss Daily – Flossing removes food particles and plaque that brushing can’t reach.
  • Use Mouthwash – An antibacterial mouthwash can help kill bacteria and prevent plaque buildup.
  • Visit Your Dentist Regularly – Regular checkups allow your dentist to catch any early signs of decay.
  • Avoid Sugary Foods and Drinks – Sugar feeds bacteria, leading to cavities. Cut back on sweets and soda.
  • Drink Plenty of Water – Water helps wash away food particles and bacteria.
  • Avoid Hard or Sticky Foods – These can damage veneers or get stuck between your teeth.

Final Thoughts

While veneers themselves do not get cavities, the natural teeth beneath them can still decay. Taking care of your oral health is the best way to keep your smile looking great and cavity-free. Regular dental visits, good hygiene, and healthy eating habits will help you maintain your veneers and protect your natural teeth for years to come. If you experience any issues, don’t wait—see your dentist right away!

Share this post:

Getting veneers is a popular way to enhance your smile, but many people worry about whether the procedure is painful. The good news is that most patients experience only mild discomfort, and any pain is usually manageable. In this article, we’ll break down everything you need to know about pain and discomfort when getting veneers.

How Painful Is It to Get Veneers?

The process of getting veneers involves several steps, and the level of discomfort can vary depending on the type of veneers and the individual’s pain tolerance. Here’s what you can expect:

  • Numbing: Before the procedure, the dentist will usually numb the area with a local anesthetic, so you won’t feel much during the treatment.
  • Tooth Preparation: Some enamel may need to be shaved down to make room for the veneers. This can cause minor sensitivity but is not usually painful due to the numbing agent.
  • Veneer Placement: The bonding process involves placing the veneers onto your teeth and using a special light to harden the adhesive. Most patients don’t feel pain at this stage.

Overall, any discomfort is minimal and temporary, making veneers a relatively painless procedure.

How Long Do Your Teeth Hurt After Getting Veneers?

After the procedure, it’s normal to experience some mild discomfort or sensitivity. Here’s what you need to know about recovery:

  • First Few Hours: If anesthesia was used, you may feel numb for a few hours.
  • First Few Days: Your teeth may be sensitive to hot and cold foods and drinks. Over-the-counter pain relievers like ibuprofen can help.
  • First Week or Two: Your gums and jaw might feel slightly sore as your mouth adjusts to the new veneers.
  • Long-Term Sensitivity: Some patients experience lingering sensitivity for a few weeks, but this usually fades over time.

If you feel severe or prolonged pain, it’s important to contact your dentist to ensure there are no issues with the veneers.

Do Your Teeth Go Bad Under Veneers?

Veneers are designed to protect and enhance your teeth, but proper care is essential. Here’s how to maintain your dental health:

  • Good Oral Hygiene: Brush and floss daily to keep bacteria from building up around the veneers.
  • Regular Dental Visits: Routine check-ups help ensure your veneers and natural teeth stay in good shape.
  • Avoid Hard Foods: Biting into hard foods like ice or nuts can damage veneers and put stress on your natural teeth.
  • Watch for Decay: While veneers cover the front of your teeth, cavities can still form on the back and between teeth if proper care isn’t taken.

With the right maintenance, your natural teeth should remain healthy under the veneers.

Do They Put You to Sleep for Veneers?

Most patients do not need to be put to sleep for veneers. Here’s what you can expect in terms of pain management:

  • Local Anesthesia: Dentists typically use a numbing agent to prevent discomfort during the procedure.
  • Sedation Options: For patients with severe dental anxiety, sedation dentistry (such as nitrous oxide or oral sedatives) may be available.
  • No General Anesthesia: Since veneers are a minimally invasive procedure, general anesthesia is not necessary.

If you’re nervous about the process, talk to your dentist about sedation options to make the experience more comfortable.

How to Minimize Discomfort When Getting Veneers

If you’re worried about pain, here are some tips to make the process easier:

  • Take Over-the-Counter Pain Relievers: Medications like ibuprofen can help with any post-procedure discomfort.
  • Avoid Extremely Hot or Cold Foods: Your teeth may be sensitive after getting veneers, so stick to lukewarm foods and drinks.
  • Use a Soft-Bristle Toothbrush: This will help keep your veneers and gums in good condition without causing irritation.
  • Communicate with Your Dentist: If you have any concerns about pain or sensitivity, let your dentist know so they can adjust your treatment plan.

Conclusion

Getting veneers is not as painful as many people think. While there may be some minor discomfort during and after the procedure, it is usually manageable with proper care and pain relief. If you experience severe pain, contact your dentist immediately to address any concerns. In the end, the benefits of a beautiful, long-lasting smile make the process worth it!


Frequently Asked Questions

1. How long does it take to recover from veneers?

Most patients adjust to their veneers within one to two weeks, though minor sensitivity may last a few weeks longer.

2. Can I eat normally after getting veneers?

Yes, but it’s best to avoid very hard or sticky foods for the first few days to let the veneers settle properly.

3. Do veneers feel natural in the mouth?

Yes! After a short adjustment period, most people find that veneers feel just like their natural teeth.

4. Will I need pain medication after getting veneers?

Over-the-counter pain relievers like ibuprofen are usually sufficient for any temporary discomfort.


Share this post:

Veneers are a great way to enhance your smile, but many people wonder if they can stain over time. The answer depends on the type of veneers you have and how well you take care of them. In this article, we’ll explore whether veneers stain, how to prevent discoloration, and what to do if your veneers lose their brightness.

Can You Get Stains Off Veneers?

Porcelain veneers are highly resistant to stains because they are non-porous, meaning they do not absorb food, drinks, or other substances that cause discoloration. However, composite veneers are more porous and can stain over time.

Here’s how you can remove surface stains from veneers:

  • Brush and Floss Daily – Regular brushing with a non-abrasive toothpaste can help remove minor stains.
  • Use a Gentle Whitening Toothpaste – Some toothpastes are specially formulated for veneers.
  • Professional Cleaning – Your dentist can polish your veneers to remove surface stains.
  • Avoid Stain-Causing Foods and Drinks – Coffee, tea, red wine, and dark berries can lead to staining over time.

If stains persist, consult your dentist for professional solutions.

Do Teeth Go Yellow Under Veneers?

Veneers only cover the front surface of your teeth, so the natural tooth underneath can still change color over time. Here are some reasons your teeth may turn yellow under veneers:

  • Gum Recession – As gums recede with age, more of the natural tooth is exposed, which may appear discolored.
  • Tooth Decay – If the underlying tooth decays, it may show through the veneer.
  • Improper Bonding – If veneers are not fitted properly, stains and bacteria can accumulate at the edges.

To prevent yellowing, maintain good oral hygiene and visit your dentist regularly.

Are There Veneers That Don’t Stain?

Yes! Porcelain veneers are the best option for stain resistance because they do not absorb pigments from food and drinks. Composite veneers, however, are more prone to staining.

Here’s a comparison:

  • Porcelain Veneers – Highly resistant to stains and last 10-20 years.
  • Composite Veneers – More affordable but can stain over time and last 5-7 years.

If stain resistance is a priority, porcelain veneers are the better choice.

How Long Do Veneers Stay White?

Porcelain veneers can stay white for decades with proper care. However, composite veneers may need more frequent maintenance.

To keep your veneers white for as long as possible, follow these tips:

  • Brush Twice a Day – Use a soft-bristled toothbrush and non-abrasive toothpaste.
  • Floss Daily – Prevent plaque buildup around the edges of veneers.
  • Limit Staining Foods and Drinks – Reduce consumption of coffee, tea, red wine, and dark sauces.
  • Avoid Smoking – Tobacco can stain natural teeth and the edges of veneers.
  • Visit Your Dentist Regularly – Routine cleanings help maintain veneer brightness.

With the right care, your veneers can stay bright and beautiful for years to come.

Conclusion

Veneers are a fantastic way to achieve a white, beautiful smile, but their longevity and brightness depend on proper care. Porcelain veneers are highly resistant to stains, while composite veneers require more maintenance. By practicing good oral hygiene, avoiding stain-causing foods and drinks, and visiting your dentist regularly, you can keep your veneers looking their best for years.

If you notice any discoloration or changes in your veneers, consult your dentist to explore solutions and maintain your bright, confident smile!


Share this post:

Yes, your teeth can continue to whiten slightly after a professional whitening treatment. This is because the whitening agents, like hydrogen peroxide, can keep working for a short time after the procedure. However, the most noticeable change happens during the treatment itself.

Do Your Teeth Get Whiter After Teeth Whitening?

After a whitening treatment, your teeth may continue to lighten a bit over the next couple of days. This is due to the ongoing action of the whitening agents used during the procedure. For example, after a Zoom whitening session, teeth can continue to whiten for up to two weeks. It’s important to avoid foods and drinks that can stain your teeth during this time to maintain the best results.

Will My Teeth Turn Yellow Again After Whitening?

Teeth whitening isn’t permanent. Over time, your teeth can become discolored again, especially if you’re exposed to staining substances. Factors that can cause your teeth to turn yellow again include:

  • Smoking: Tobacco products can stain teeth.

  • Dark-colored beverages: Drinks like coffee, tea, red wine, and cola can lead to discoloration.

  • Certain foods: Foods such as berries, soy sauce, and beetroot can cause stains.

  • Poor oral hygiene: Not brushing and flossing regularly can allow plaque buildup, leading to discoloration.

To keep your teeth white for as long as possible, it’s important to maintain good oral hygiene and limit exposure to staining substances.

How Long Does Teeth Whitening Last?

The duration of teeth whitening results varies based on several factors, including the type of treatment and your habits. Here’s a general guideline:

  • Professional in-office treatments: Results can last from six months up to three years. This depends on your oral care routine and lifestyle choices.

  • At-home whitening products: Over-the-counter products may provide results that last for a few months. Their effectiveness often depends on consistent use and following the product instructions.

Remember, individual results can vary. Regular dental check-ups and cleanings can help maintain your bright smile.

How Often Should You Get Teeth Whitening Treatment?

Before and After Teeth Whitening Photo

The frequency of teeth whitening treatments depends on your personal needs and the type of treatment used. General recommendations include:

  • Professional treatments: Many people choose to have whitening treatments every six months to a year. This helps maintain their desired level of whiteness.

  • At-home products: Some products are designed for more frequent use, such as monthly touch-ups. Always follow the manufacturer’s guidelines to avoid overuse, which can lead to tooth sensitivity or damage.

Consult with your dentist to determine the best whitening schedule for your teeth. They can provide personalized advice based on your dental health and whitening goals.

Tips to Maintain a Bright Smile After Whitening

To prolong the effects of your teeth whitening treatment, consider the following tips:

  • Practice good oral hygiene: Brush your teeth at least twice a day and floss daily to remove plaque and prevent stains.

  • Use a whitening toothpaste: This can help remove surface stains and maintain your smile.

  • Avoid staining foods and drinks: Limit consumption of items known to stain teeth. If you do consume them, rinse your mouth with water afterward.

  • Quit smoking: Tobacco use can cause significant tooth discoloration. Quitting can improve your oral health and help keep your teeth white.

  • Regular dental visits: Professional cleanings can remove surface stains and keep your teeth and gums healthy.

By following these guidelines and maintaining a healthy lifestyle, you can enjoy a brighter, whiter smile for a longer period.

Share this post:

Happy Holidays, From Our Family To Yours!

Our offices will be closed from December 24th through December 29th to celebrate the holidays. We’ll be back and ready to assist you on Monday, December 30th.

We wish you a joyous holiday season and a Happy New Year!