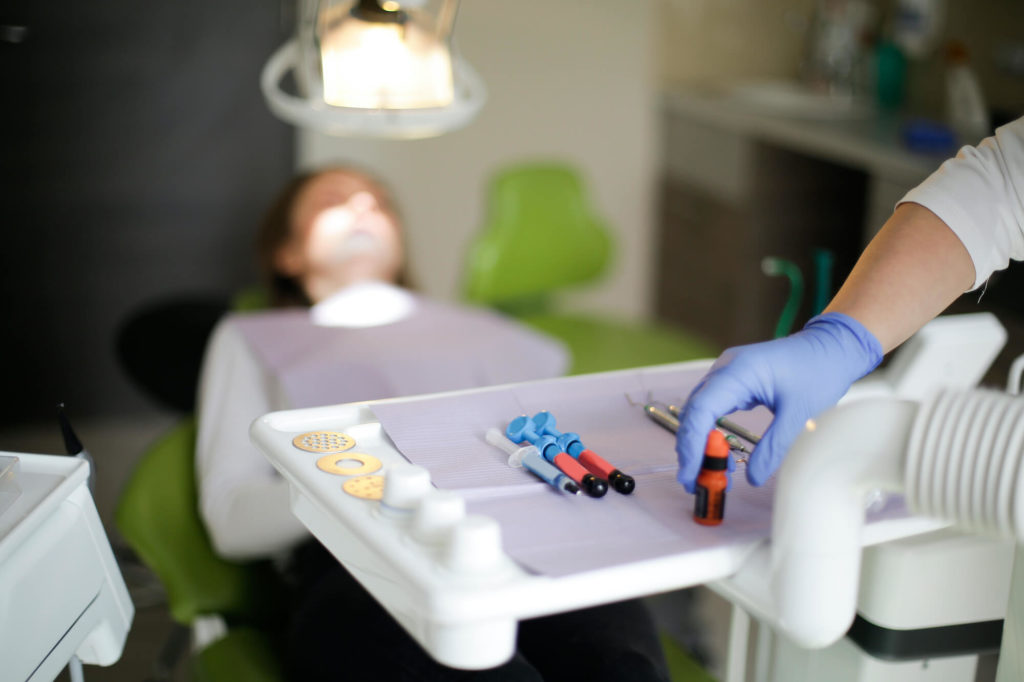
We’ve all been there. You sit down for your dental appointment, ready and prepared for a filling or crown, and then…the blood pressure cuff comes out. And we think, “What’s this for?” Read along as we get answers on why your dentists and dental hygienists check your blood pressure at your dental appointment.
Why did they take my blood pressure at the dentist?
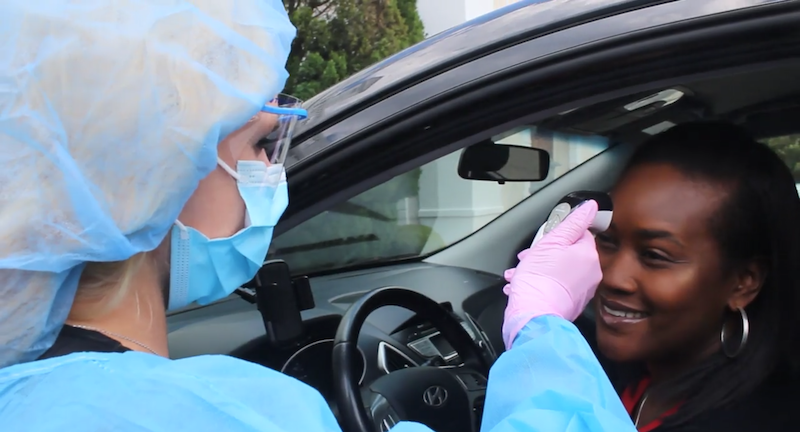
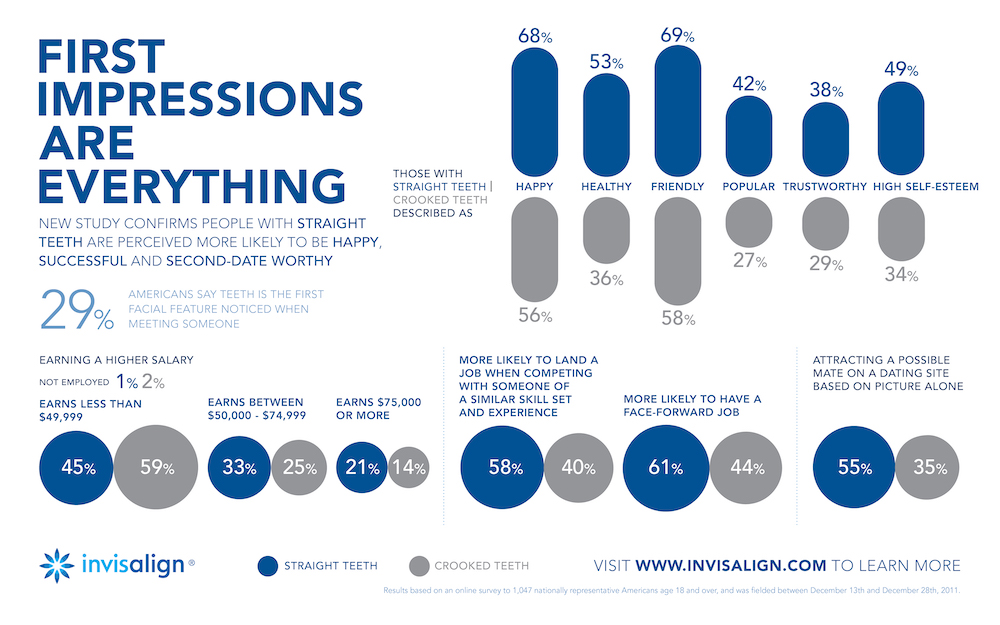
There are many reasons why the dentist or assistant may need to check your blood pressure at your appointment. This can range from establishing your baseline to alerts in hypertension to measuring your anxiety levels. Namely, your blood pressure is key to understanding your overall health at the time of your appointment.
This is especially important since many Americans see their dentist more often than their physician at every 6-month cleaning. It’s a crucial health check and an opportunity to understand the changes in your overall health.
Can dental problems cause high blood pressure?
As humans, our bodies react differently when we are in pain or experiencing high anxiety. If you have high blood pressure, your dentist may need to adjust your treatment plan. Once determined, your dentist can make a better customized treatment plan for your specific needs.
For example, some dentists may be able to offer light sedation options for those patients who have high anxiety which is causing their blood pressure to rise. Additionally, patients who are in pain from a tooth that needs to be extracted will see a drop in their blood pressure after that painful tooth has been removed.
In extremely hypertensive situations, however, you may be asked to visit your primary care physician to discuss ways to reduce your blood pressure before beginning any dental care treatment.
What blood pressure is too high for dental treatment?
Obviously this range is going to depend on many factors. The type of procedure, whether or not you are currently taking blood pressure medications, and many other health history factors. Typically, however, high blood pressure is considered to be 140/90 or above. Also, if your top number (systolic) is greater than 140 or your bottom number (diastolic) is greater than 90, you may have high blood pressure no matter what the other number reads.
If you are suffering from hypertension, your physician can determine the best course of action. This may include blood pressure medication or lifestyle changes. Many dentists and oral surgeons will also require medical approval from your cardiologist or physician before they will operate.
Can I refuse to have my blood pressure taken at the dentist?
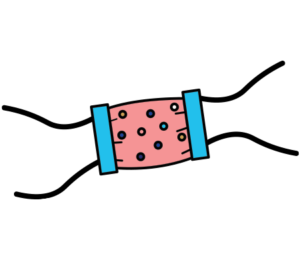
Ultimately, your blood pressure allows dentists and hygienists to know that you are healthy enough to endure the treatment. It also gives them an indication as to which form of anesthetic to use (for example, anesthetics without epinephrine). By refusing, you are consequently putting your own health at risk and your dentist will most likely refuse to proceed. Taking your oral health seriously is important to your overall health and well-being.
Taking the time to check these key health measures is an incredibly important step in your dental treatment.
Start your treatment today!
At Lane & Associates Family Dentistry, we not only check your blood pressure, but also offer oral cancer screenings, oxygen level checks, and pulse checks. The combination of these factors & our many other services, let’s us know how best to treat our patients and make their experience with us truly one that makes them smile. If you are looking for a dentist that takes your overall health seriously, contact us today!

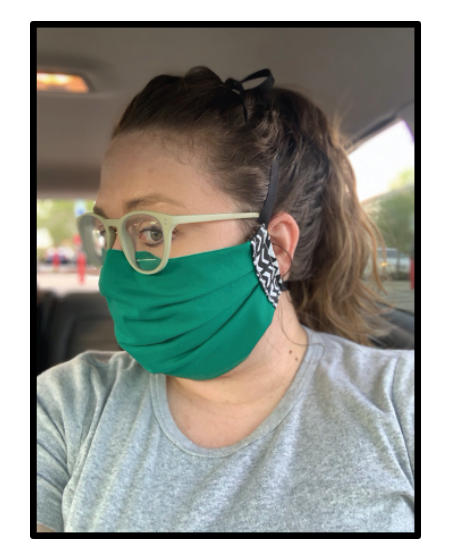

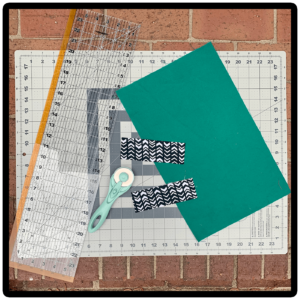
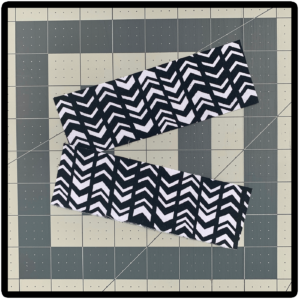
 Take your 100% Cotton fabric and cut (1) rectangle that is 10 inches wide and 16 inches long. Then cut (2) pieces of fabric into 2×6 inch strips.
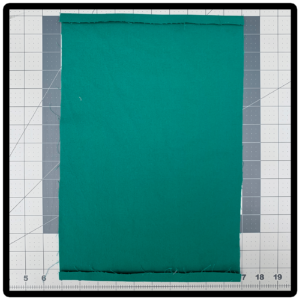
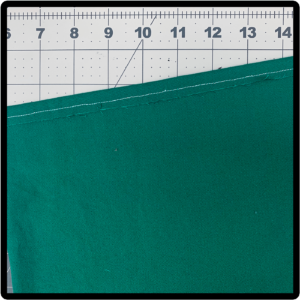
 With the front side of the fabric facing down (wrong side up), fold over 1/2 inch on the top and bottom (10-inch sides). Press and stitch across both folds.
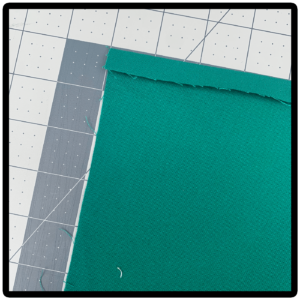
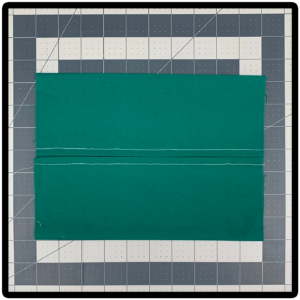
 With the wrong side up, fold the top and bottom edges to meet in the middle and use the iron to press.
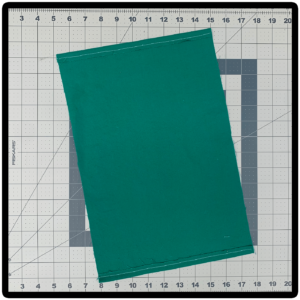
 On each side of the mask, make 3 pleats. Each pleat should be approximately 1 inch in size with the top two pleats folded down from the top and the bottom pleat folded up from the bottom. These should be centered in the mask, leaving 2-3 inches of flat fabric at the top and bottom of the pleats.
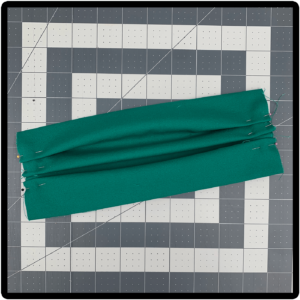

 Sew pleats into place.
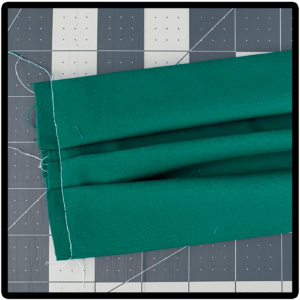
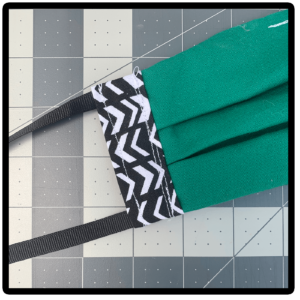
 Fold the lengthwise sides of the 2×6 edging material inwards at the middle and press.
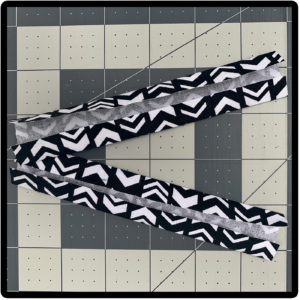
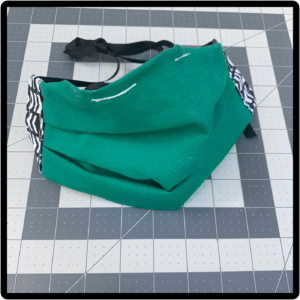
 Place the edging material with unfinished sides up and lay the mask front side down. Align the sides to the middle of the edging. Place the ribbon 1/2 inch from the edge corner, pin it into place, and sew across the stitching to hold everything in place.
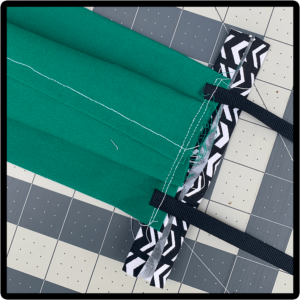
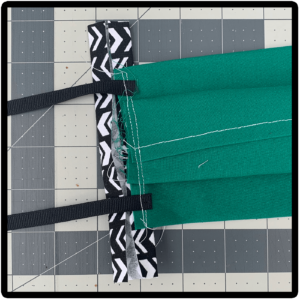
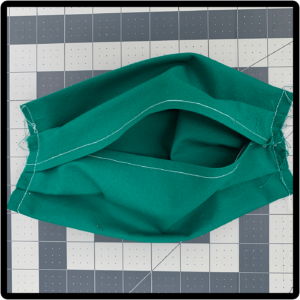
 Fold the top and bottom edging pieces inwards, meeting in the middle. Be sure they cover the raw edges of the mask and ribbon (this may fold the mask inward as well).
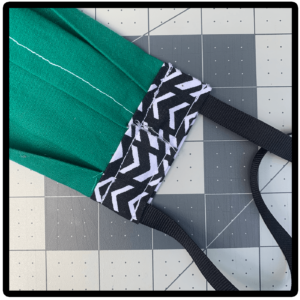
 Stitch both sides of the edging closed.
 Sew (2) 1-inch stitches, approximately 1/4 inch across the top of the mask, so a pipe cleaner can be inserted if desired.
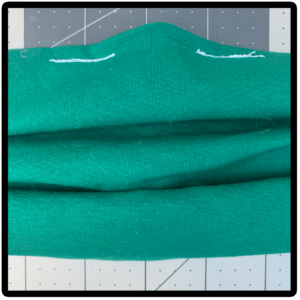


